An electric shaver that stops cutting properly is one of the most frustrating grooming problems a man can encounter. The shave that used to take three minutes now takes seven. Hair is being pulled rather than cut. Patches are being missed on every pass. The shaver sounds different than it used to. You are pressing harder and getting less result.
Before assuming the shaver is dead or immediately buying a replacement, work through this troubleshooting guide. The vast majority of electric shaver performance problems have simple, fixable causes. Most are resolved in under ten minutes without spending a dollar. This guide covers every known cause of poor electric shaver performance and gives you the precise fix for each one.
Problem #1: The Shaver Is Tugging or Pulling Hair
Tugging is the most common electric shaver complaint and the one with the most straightforward fixes.
Cause A: Worn or Dull Blades
This is the most likely cause. Blades dull gradually over months of use. A dull blade bends hair before cutting it rather than severing cleanly at skin level. The bending sensation is what creates the pulling feeling against the skin.
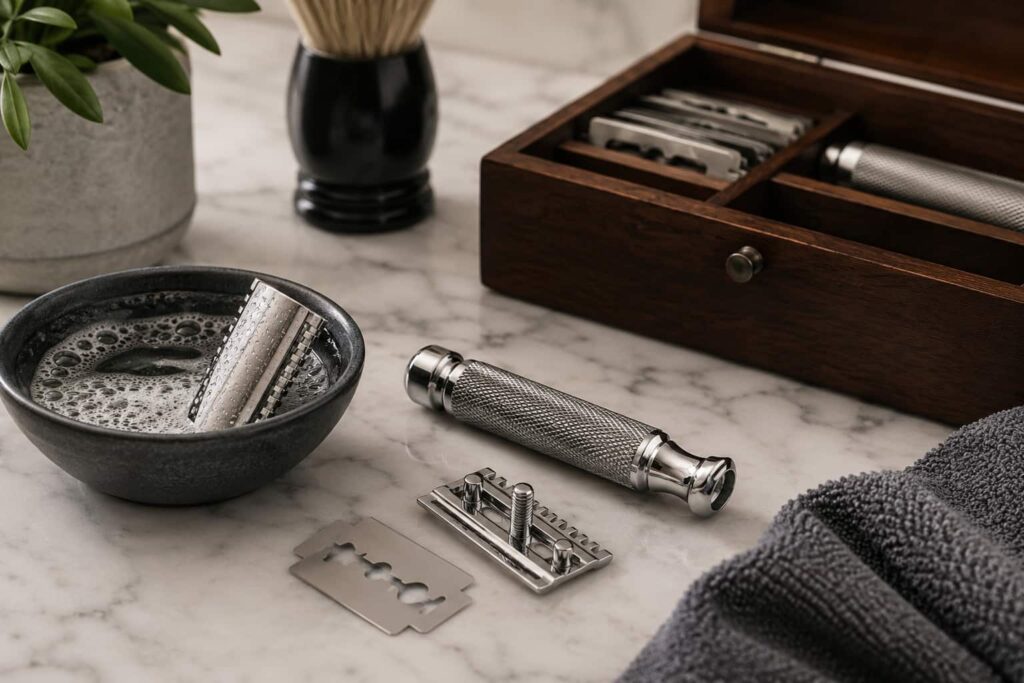
The fix: Replace the foil and blade cassette. This single action resolves tugging in the majority of cases where the shaver is otherwise functioning normally. Replace at 12 to 18 months by schedule rather than waiting for tugging to appear. Our complete guide on how to clean and maintain your electric shaver covers the blade replacement process step by step.
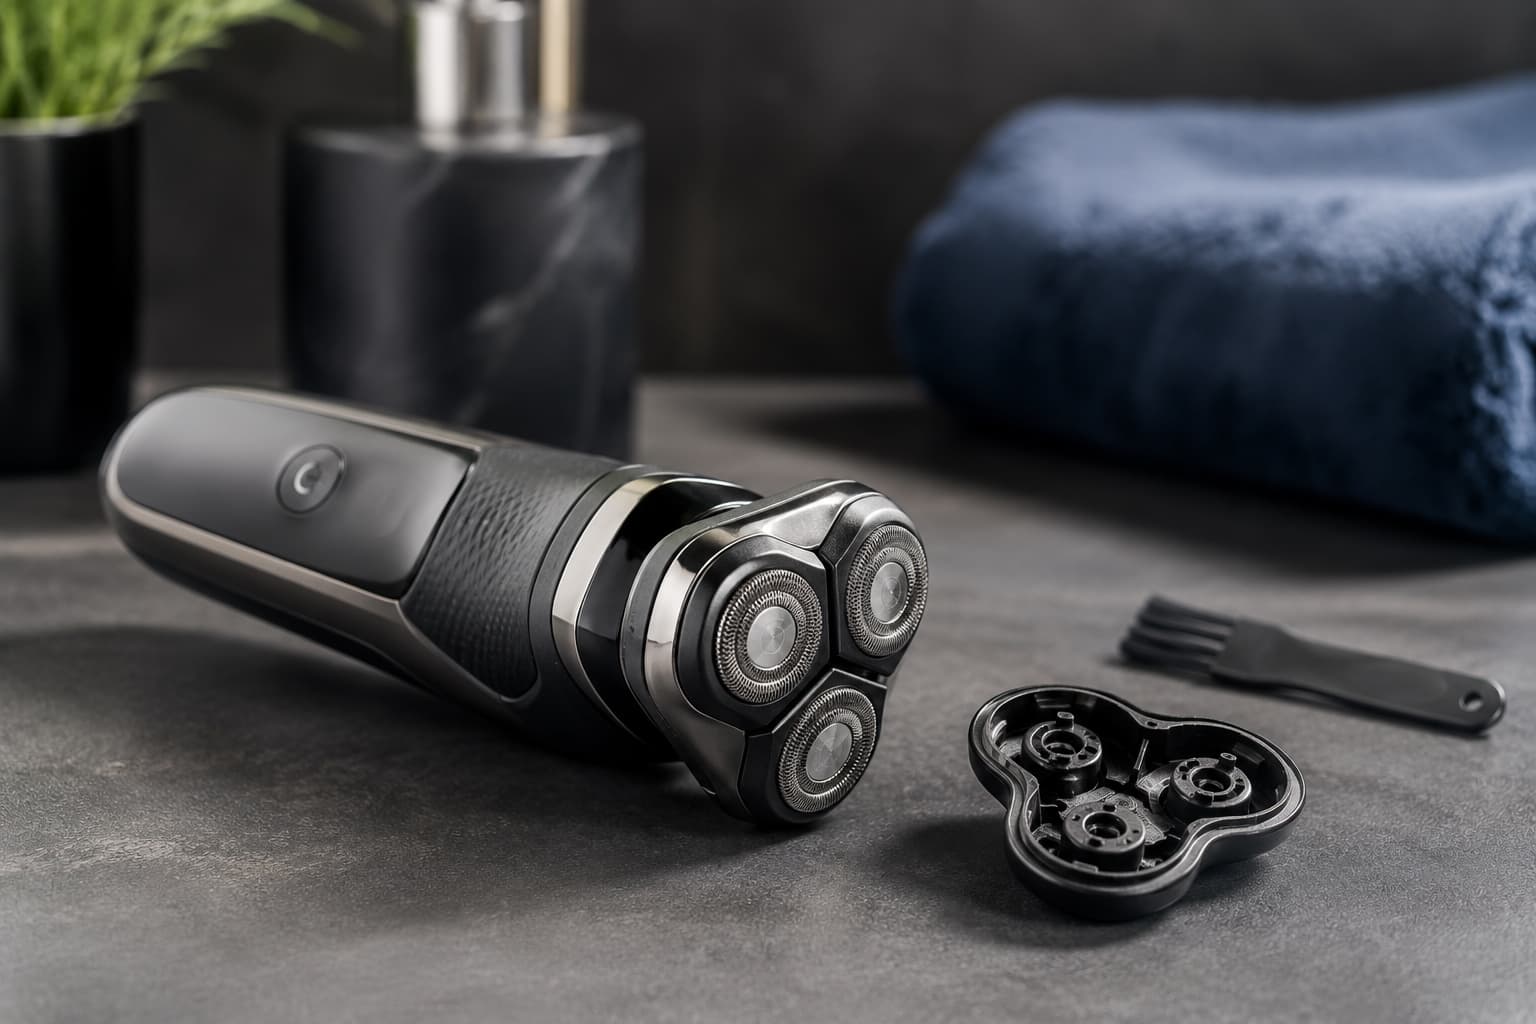
Cause B: Dirty or Clogged Shaver Head
Packed hair debris inside the foil or rotary head prevents the cutting elements from moving freely. Restricted blade movement increases the force required per cut, creating a tugging sensation even with sharp blades.
The fix: Clean the shaver thoroughly. Remove the foil cassette or open the rotary head. Tap out loose debris over a bin. Brush each component with the cleaning brush. Rinse under warm running water for waterproof models. Allow to dry fully before reassembling.
Cause C: Insufficient Lubrication
A dry, unlubricated blade system generates more friction per stroke. This friction increases resistance between the blade and foil, creating a dragging sensation during shaving that mimics the feel of a dull blade.
The fix: Apply one drop of dedicated shaver oil to the foil surface or rotary heads. Run the shaver for ten seconds to distribute the oil evenly. This takes thirty seconds and often resolves tugging immediately when lubrication was the cause.
Cause D: Shaving on Dry Unprepared Hair
Dry, stiff hair creates more cutting resistance than softened hair. The shaver has to work harder per hair, creating more tugging especially on coarse or dense beard types.
The fix: Shave after a warm shower or wash the face with warm water for 30 seconds before shaving. Pre-softened hair cuts noticeably more cleanly with less tugging.
Problem #2: The Shaver Is Missing Patches
Missing patches after a full pass usually point to technique issues, head contact problems, or blade wear.
Cause A: Incorrect Technique for Shaver Type
Foil shavers require short, overlapping linear strokes with the foil kept flat against the skin throughout each stroke. Long sweeping passes cause the foil head to lift away from the skin between zones, missing hairs in the transition gaps.
Rotary shavers require slow circular motions. Using a rotary shaver in straight linear strokes fundamentally misaligns the blade contact with the spinning direction of the heads, leaving patches consistently.
The fix: Review your technique. For foil, use short overlapping strokes of two to three centimeters. For rotary, use slow coin-sized circular motions across each facial zone.
Cause B: Insufficient Head Flexibility
A shaver head that has lost its flex due to age, debris buildup, or physical damage cannot maintain consistent skin contact across facial contours. Hairs in the zones where the head loses contact are missed.
The fix: Clean the pivot mechanism thoroughly. Debris accumulation around the head pivot is one of the most common causes of reduced flex in older shavers. If cleaning does not restore flex, the head assembly may need replacement.
Cause C: Hair Too Long for the Foil
Standard foil shavers are designed for one to three days of stubble growth. Growth beyond this range is often too long to enter the foil perforations cleanly. The result is the foil gliding over longer hairs rather than capturing them.
The fix: For longer growth, use a pre-trimmer or trimmer attachment to reduce hair length before the main foil pass. Models with Intercept pre-trimming technology (Remington F9) handle this automatically. Shaving more frequently keeps stubble within the foil’s optimal capture range.
Cause D: Damaged or Deformed Foil
A foil with damaged perforations, dents, or deformations cannot capture hairs efficiently across the damaged zone. Certain areas will consistently miss hairs even with correct technique.
The fix: Inspect the foil under good light. Any visible damage to the perforated surface means the foil needs replacement. A replacement cassette restores full coverage immediately.
Problem #3: The Shave Is Less Close Than It Used to Be
Gradual closeness decline is the most commonly accepted but least necessary performance compromise with electric shavers.
Cause A: Blade Wear (Most Common)
As explained in Problem #1, worn blades bend hair before cutting rather than severing cleanly at skin level. A bent hair is cut at a point fractionally above skin level compared to a clean cut, leaving a slightly longer stubble end. Across a full face this accumulated difference is noticeable as reduced closeness.
The fix: Replace the blade cassette at 12 to 18 months by schedule. A fresh cassette typically restores closeness to near-new levels immediately.
Cause B: Debris Buildup Lifting the Foil from Skin
Packed debris inside the foil head physically lifts the foil surface away from the skin by a fraction of a millimeter. This micro-gap prevents the blades from cutting as flush to the skin as they do on a clean foil. The result is reduced closeness that improves immediately after thorough cleaning.
The fix: Deep clean the shaver. Disassemble the foil cassette completely, wash with mild soap, rinse thoroughly, dry fully before reassembling, then lubricate. This often restores closeness without any replacement required.
Cause C: Reduced Motor Speed from Wear or Battery Degradation
Over years of use, motor components and battery cells degrade. A motor running below its designed speed completes fewer cutting cycles per second, reducing single-pass cutting efficiency. The shave requires more passes to achieve the same closeness as before.
The fix: If blade replacement and thorough cleaning do not restore closeness, motor or battery degradation may be the cause. Check the battery life section below for battery assessment. For motor wear, the shaver may need professional service or replacement.
Cause D: Technique Drift
Men who have used the same shaver for years sometimes drift into inefficient technique habits without noticing. Strokes become longer and less methodical, pressure increases, and systematic zone coverage gives way to random passing.
The fix: Deliberately return to short, overlapping strokes with light pressure. Work systematically through each facial zone rather than passing randomly. Most men notice an immediate improvement in closeness from technique correction alone.
Problem #4: The Shaver Is Louder Than Normal
A shaver that has become noticeably louder than it used to be is signaling a specific mechanical issue.
Cause A: Debris in the Blade Mechanism
Loose hair debris rattling inside the blade mechanism during operation creates a buzzing or rattling sound beyond the normal motor noise.
The fix: Clean the shaver thoroughly. Tap out all loose debris and rinse the cutting components under running water for waterproof models. The sound typically resolves immediately after cleaning.
Cause B: Dry Unlubricated Blades
Unlubricated blades create more mechanical friction against the foil screen. This friction generates additional noise beyond the motor’s normal operating sound.
The fix: Apply one drop of shaver oil to the foil surface. Run the shaver for ten seconds. An immediately noticeable reduction in noise confirms lubrication was the cause.
Cause C: Loose Foil Cassette
A foil cassette that is not fully seated in its housing vibrates against the body during operation, creating rattling or buzzing sounds distinct from the normal motor noise.
The fix: Remove the foil cassette completely and reseat it firmly until it clicks securely into position. If the cassette no longer clicks firmly into place, the retention mechanism may be worn and the cassette or housing may need replacement.
Cause D: Motor Wear
A motor that has developed internal mechanical wear runs with more friction than a healthy motor. This increased friction manifests as a higher-pitched or more strained motor sound compared to the shaver’s normal operating noise.
The fix: If thorough cleaning and lubrication do not reduce noise, internal motor wear is the likely cause. A shaver over five years old with persistent increased motor noise is approaching end of practical service life.
Problem #5: The Shaver Is Running Slower or Feels Weaker
A shaver that feels less powerful than it used to may have one of several fixable causes before motor failure becomes the explanation.
Cause A: Debris Overload Slowing the Motor
An extremely clogged shaver head creates enough resistance on the motor that the motor slows measurably under the cutting load. This can feel like reduced power when the actual cause is resistance rather than motor weakness.
The fix: Clean the shaver completely. If power returns to normal after cleaning, debris load was the cause.
Cause B: Low Battery
A battery at low charge runs the motor at reduced speed even before the shaver shows a low battery indicator. This is particularly noticeable on older batteries that discharge less linearly.
The fix: Charge the shaver fully and test again. If full-charge power is noticeably higher than pre-charge power, battery aging is contributing to the performance variation.
Cause C: Using in Cold Temperatures
Lithium-ion batteries lose charge capacity temporarily in cold environments. A shaver stored in a cold bathroom or used in a cold room may feel sluggish compared to its normal performance.
The fix: Allow the shaver to reach room temperature before use. Performance typically returns to normal once the battery warms to its operating temperature range.
Cause D: Motor Wear
After five or more years of daily use, motor components wear and the motor delivers less torque than it did when new. This is a natural end-of-life progression rather than a sudden failure.
The fix: If cleaning, lubrication, and battery assessment do not restore power, the motor is the likely cause. This typically indicates the shaver is approaching the end of its useful service life and replacement is the most practical solution.
Problem #6: The Battery Dies Faster Than Before
Battery performance degradation is a natural and inevitable part of any rechargeable electric shaver’s lifespan.
Cause A: Normal Battery Cell Aging
Lithium-ion battery cells lose capacity progressively over charge cycles. A shaver battery that provided 60 minutes of runtime when new may provide 35 to 40 minutes after two to three years of daily charging. This is normal chemistry, not a malfunction.
The fix: If the reduced runtime is still adequate for shaving sessions, continue using the shaver. If runtime has dropped below 20 to 25 minutes from a full charge and shaving sessions are being interrupted, battery replacement or shaver replacement is appropriate.
Cause B: Incorrect Charging Habits
Allowing the battery to fully discharge before recharging repeatedly, or leaving the shaver on the charging station continuously for months, can accelerate battery degradation beyond the normal rate.
The fix: Charge the shaver when battery drops to 20 to 30 percent rather than running to complete discharge. Remove from the charging station once full rather than leaving permanently connected. These habits slow future degradation but cannot restore already lost capacity.
Cause C: Old Battery Needing Replacement
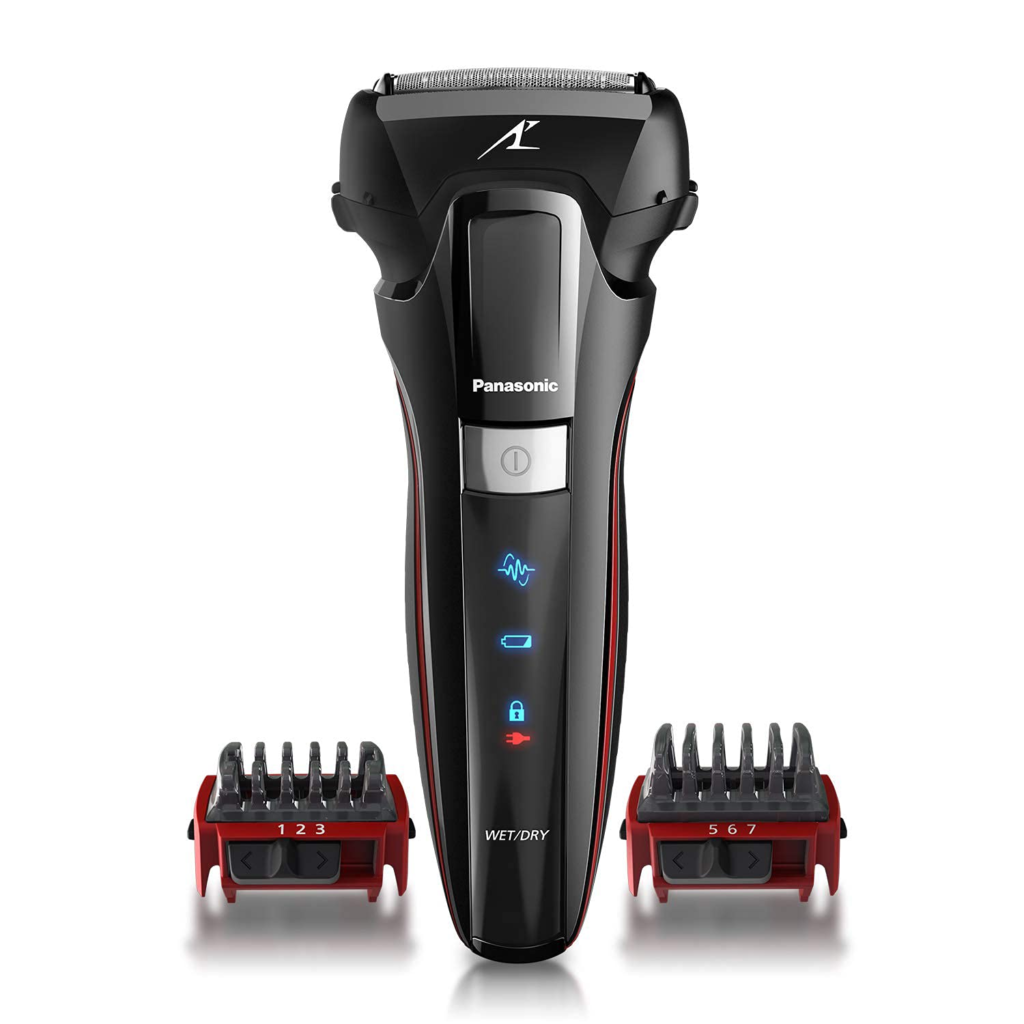
Some premium shavers from Braun and Panasonic support professional battery replacement through manufacturer service centers.
The fix: Check the manufacturer’s website for battery replacement service availability for your specific model. Compare the service cost against the price of a comparable new mid-range shaver before committing to battery replacement. Our guide on how long electric shavers last covers the full repair vs replace decision in detail.
Problem #7: The Shaver Is Causing More Skin Irritation Than Before
Increasing post-shave irritation from a shaver that previously caused no issues is a specific signal pointing to maintenance problems.
Cause A: Worn Blades Creating More Mechanical Friction
Dull blades require more mechanical force per cut. This increased force translates to more friction against skin tissue on every stroke. Across a full face the cumulative friction increase causes noticeably more post-shave redness than fresh, sharp blades producing clean cuts.
The fix: Replace the blade cassette. Increasing irritation with no other routine changes is one of the clearest signals that blades are overdue for replacement.
Cause B: Dirty Foil Generating Heat
A clogged foil generates significantly more heat during operation than a clean one. Heat is a primary trigger for post-shave irritation on sensitive skin. A shaver that feels warmer than normal against the face during use is signaling this problem.
The fix: Deep clean the shaver thoroughly. If the foil feels noticeably cooler against the face after cleaning, debris heat generation was the cause of increased irritation.
Cause C: Damaged Foil with Rough Edges
Microscopic damage to the foil perforations creates rough edges that abrade rather than guide skin during the shaving stroke. This increased abrasion is not always visible to the naked eye but creates a noticeable increase in skin redness and post-shave sensitivity.
The fix: Replace the foil cassette. If irritation resolves after a new foil installation, foil damage was the cause even if it was not clearly visible.
Cause D: Changed Skin Condition
If the shaver and maintenance routine have not changed but irritation has increased, consider whether your skin condition has changed. New medications, seasonal skin changes, increased stress, or a change in skincare products can all increase skin reactivity to the same shaving conditions that previously caused no issues.
The fix: Review any changes to medication, skincare products, or health conditions in parallel with the shaver troubleshooting. If shaver fixes do not resolve the irritation, the cause may be external to the shaver itself.
Problem #8: The Shaver Is Not Turning On
A shaver that does not turn on has a limited range of causes, most of which are simple to diagnose.
Cause A: Depleted Battery
A battery that has been fully discharged and left uncharged for an extended period may not respond immediately when placed on charge. Deeply discharged lithium-ion batteries sometimes require 10 to 15 minutes of charging before the shaver can power on.
The fix: Connect to the charger for at least 15 minutes before attempting to power on. If the shaver still does not respond after 15 minutes of charging, proceed to the next cause.
Cause B: Faulty Charging Connection
A loose charging connection, a damaged charging cable, or debris in the charging port can prevent the battery from receiving charge regardless of how long it is left connected.
The fix: Inspect the charging cable for visible damage. Ensure the cable is seated fully in both the shaver and the power source. Try a different power outlet. For magnetic charging connections, ensure the contacts are clean and free of debris.
Cause C: Travel Lock Engaged
Many modern electric shavers include a travel lock that prevents accidental activation. If the travel lock was engaged and forgotten, the shaver will not respond to the power button.
The fix: Check the manual for your specific model’s travel lock procedure. Typically this involves holding the power button for three to five seconds or pressing a dedicated lock button. Disengage the travel lock and attempt to power on normally.
Cause D: Internal Component Failure
If charging connection is confirmed good, battery shows charge but shaver still does not power on, an internal component failure may be the cause.
The fix: Contact the manufacturer’s customer service for your region. Many premium shavers from Braun and Panasonic are still within the two-year warranty period for internal failures. Out-of-warranty component failures on shavers over three years old typically make replacement more cost-effective than repair.
Problem #9: The Foil Screen Looks Damaged
Foil damage is immediately visible as holes, tears, dents, or deformations in the thin perforated metal screen.
Cause A: Physical Impact
Dropping the shaver onto a hard surface is the most common cause of foil damage. The foil is the thinnest component in the shaver and the most vulnerable to impact even through the outer casing.
The fix: Replace the foil and blade cassette immediately. A damaged foil is not safe to continue using. The damaged edges can cause skin abrasion and the compromised perforations cannot capture hairs efficiently.
Cause B: Cleaning with Abrasive Materials
Scrubbing the foil surface with a brush in a back-and-forth motion, using rough cleaning cloths, or cleaning with abrasive products damages the delicate foil perforations over time.
The fix: Replace the damaged foil. For future cleaning, always brush the foil in one direction only and use only the included cleaning brush rather than household cleaning tools. Rinse rather than scrub whenever possible.
Cause C: Normal Wear Beyond Service Life
Foil screens thin and develop microscopic perforations through normal use over years of shaving. A foil in service for more than 18 months may show wear damage that is not visible as dramatic tears but affects performance and should be replaced.
The fix: Replace the foil and blade cassette on schedule at 12 to 18 months rather than waiting for visible damage to appear.
Problem #10: The Shaver Works Fine Then Cuts Out Mid-Shave
A shaver that starts normally but cuts out or loses power during a session points to battery or heat management issues.
Cause A: Battery Capacity Below Minimum Operating Threshold
An aging battery that reads as “charged” may not actually hold enough capacity to sustain the motor through a full shaving session. The shaver starts on surface charge but cuts out when this surface charge is exhausted.
The fix: Charge fully and monitor runtime closely. If the shaver consistently cuts out after a predictable interval well below the rated runtime, battery degradation is confirmed. Consider battery replacement if the model supports it or shaver replacement if it does not.
Cause B: Motor Overheating
A motor that overheats during operation triggers an automatic thermal cutoff to prevent damage. This causes the shaver to cut out mid-session and typically requires a short cool-down period before it will restart.
The fix: Allow the shaver to cool for five minutes. If it restarts normally after cooling, motor overheating is confirmed. Clean the shaver thoroughly since a clogged mechanism forces the motor to work harder and generate more heat. If overheating persists after cleaning, motor wear is likely contributing.
Cause C: Intermittent Internal Connection
A loose internal connection between the battery and motor can cause intermittent power loss during vibration-heavy use. This is a manufacturing or impact-damage failure rather than a maintenance issue.
The fix: Contact the manufacturer if the shaver is within warranty. Out of warranty, intermittent connection failures are difficult to repair without specialist tools and typically indicate end-of-life for the device.
Complete Electric Shaver Maintenance Checklist
Run through this checklist before concluding any troubleshooting session. The majority of performance problems are resolved by completing all items on this list.
| Maintenance Task | Frequency | Impact on Performance |
|---|---|---|
| Quick rinse or brush clean | After every shave | Prevents debris buildup |
| Full wash with mild soap | Once per week | Removes packed debris and oils |
| Lubrication with shaver oil | Once per week | Reduces friction and blade wear |
| Foil and blade replacement | Every 12 to 18 months | Restores closeness and reduces tugging |
| Auto-cleaning station cycle | After every shave (if applicable) | Cleans, lubricates, dries automatically |
| Full battery charge | When battery drops to 20 to 30 percent | Maintains battery cell health |
| Pivot mechanism cleaning | Monthly | Restores head flexibility |
Completing every item on this checklist resolves tugging, closeness decline, increased irritation, and noise problems in the majority of cases without any part replacement required.
When to Replace vs When to Repair
Use this framework to decide whether the investment in parts or service is worthwhile.
Replace the blade cassette when:
- Tugging or closeness decline is the primary symptom
- The shaver is under five years old
- Motor and battery function normally
- It has been 12 or more months since the last cassette replacement
Service or repair when:
- The shaver is within its warranty period
- The shaver is a premium model under three years old
- Battery replacement cost is significantly below the cost of a comparable new model
Replace the whole shaver when:
- Battery life has dropped below 40 percent of original rated runtime
- Motor sounds significantly different (grinding, rattling, or strained)
- The shaver is over six years old with multiple declining performance metrics
- Replacement cassettes for the model are discontinued or no longer available
- The shaver is a budget model and a new equivalent costs less than the repair
Our complete guide on how long electric shavers last covers the full repair versus replace decision with specific guidance on cost comparison by model tier.
Best Replacement Shavers If Yours Cannot Be Fixed
If troubleshooting confirms the shaver has reached end of life, these models represent the best replacements across every budget tier.
Braun Series 9 Pro+
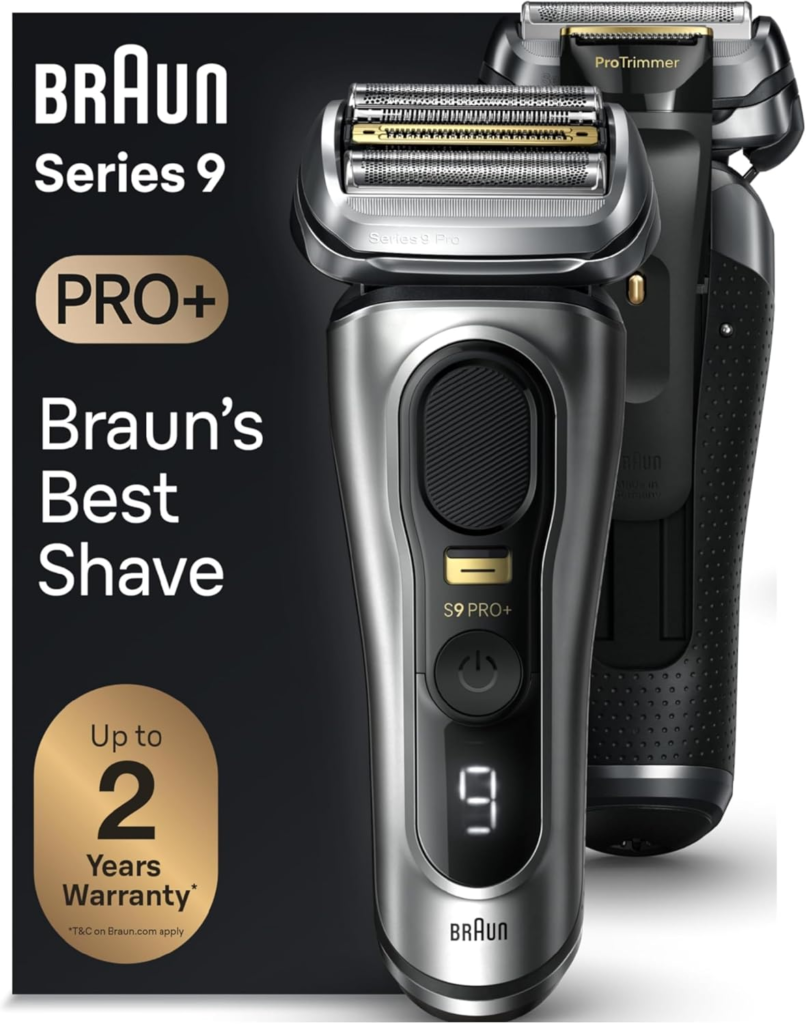
Key Specs:
- 5-sync cutting elements with ProLift active trimmer
- HyperGlide foil for skin-smooth contact
- AutoSense motor adapts to beard density
- 60-minute battery with 5-minute quick charge
- 100% waterproof IPX7
- Includes Clean and Charge Station
Pros:
- The most complete foil shaver available, combining the best skin-protective foil technology with intelligent motor adaptation and a comprehensive cleaning station that prevents the maintenance failures that brought most men to this troubleshooting guide in the first place
- ProLift active trimmer captures hairs in fewer passes, reducing total shaving time and skin exposure
- Auto-cleaning station eliminates the maintenance discipline requirement that causes performance to decline in manually cleaned shavers
Cons:
- Premium price requires a meaningful investment
- Replacement cassettes are expensive at $40 to $60
Best For: Men upgrading from any tier who want a shaver that will perform consistently for five to seven years with minimal troubleshooting requirements.
👉 Check Latest Price on Amazon
Braun Series 7 7127cs
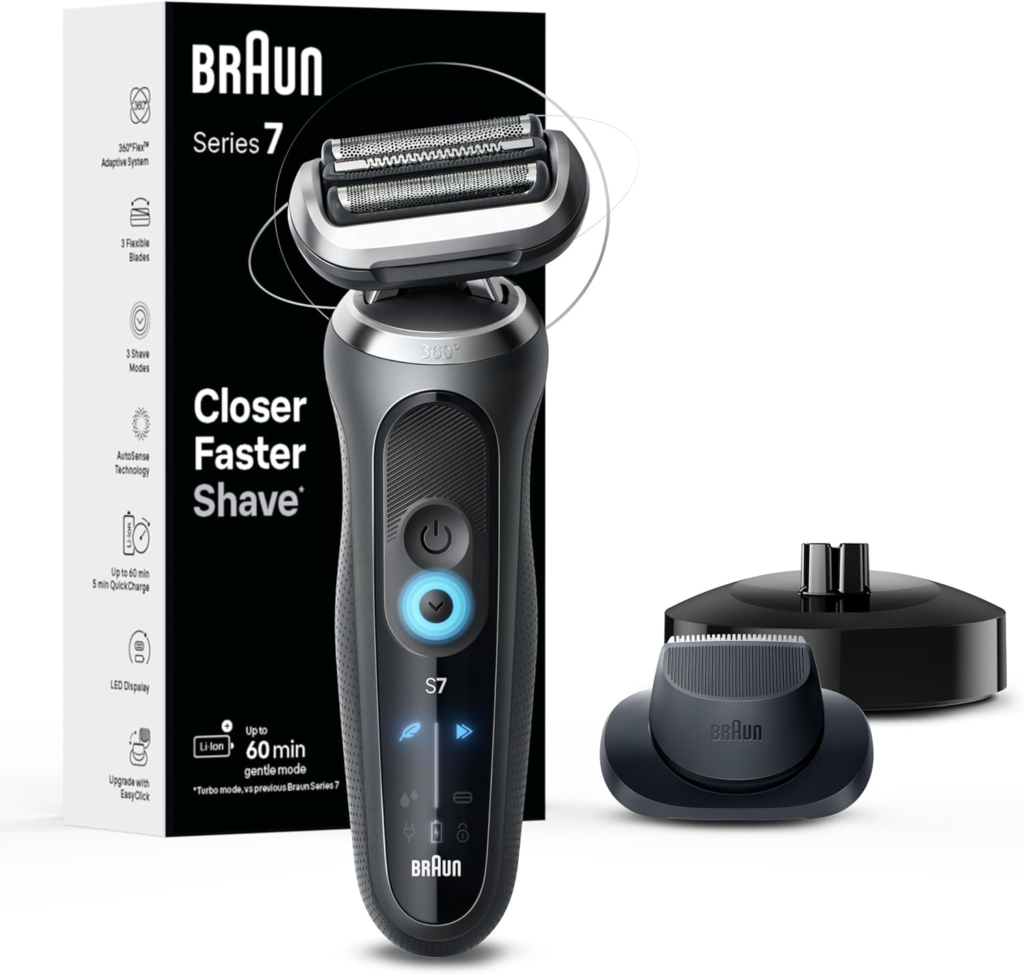
Key Specs:
- 4+1 cutting elements with Active Lift trimmer
- AutoSense motor with density sensing
- SensoFlex flex head
- 100% waterproof IPX7
- Includes Clean and Charge Station
- 50-minute battery with 5-minute quick charge
Pros:
- AutoSense motor and Clean and Charge Station provide the same two most impactful long-term performance maintenance features as the Series 9 at a lower price
- Active Lift trimmer captures flat-lying hairs in fewer passes, reducing the repeat passes that accelerate blade wear
- Mid-range price with premium-adjacent longevity when the included cleaning station is used consistently
Cons:
- One fewer cutting element than Series 9
- HyperGlide foil not present
Best For: Men upgrading from a budget or mid-range shaver who want the best combination of cleaning station convenience and skin-protective technology at a mid-range price.
👉 Check Latest Price on Amazon
Panasonic ES-LL41-K
Key Specs:
- 4-blade system with nano-polished blades
- 13,000 CPM linear motor
- Multi-flex pivoting head
- 100% waterproof IPX7
- 45-minute battery
Pros:
- 13,000 CPM motor and nano-polished blades deliver near-Arc5 performance at a mid-range price, a meaningful upgrade for men replacing a budget shaver
- Nano-polished blades maintain their cutting edge significantly longer than standard stainless blades, extending the interval before the blade wear problems that often initiate troubleshooting searches
- Full IPX7 waterproofing enables the most thorough post-shave cleaning method available, reducing debris buildup that caused performance problems in the previous shaver
Cons:
- No auto-cleaning station in standard configuration
- No adaptive motor technology
Best For: Men replacing a budget or entry mid-range shaver who want a meaningful performance upgrade focused on motor power and blade quality without the full premium price.
👉 Check Latest Price on Amazon
Remington Electric Razor

Key Specs:
- Intercept shaving technology
- 5 flexible foil heads
- 60-minute battery
- Fully washable
- Pop-up detail trimmer
Pros:
- Best budget replacement option with Intercept pre-trimming that handles growth up to three days more effectively than the standard flat foils on most entry-level shavers
- 60-minute battery provides more than adequate runtime for any daily shaving session
- Fully washable construction enables easy thorough cleaning after every use
Cons:
- Motor speed below mid-range and premium alternatives
- No adaptive motor technology
Best For: Men on a tight budget replacing a failed entry-level shaver who want a reliable upgrade within the budget tier.
👉 Check Latest Price on Amazon
Who This Guide Is For
Men whose shaver has recently started tugging or pulling and want to fix the problem before replacing a shaver that is likely only in need of a new blade cassette and a thorough clean.
Men whose shave quality has declined gradually over months and accepted the deterioration as normal without realizing it is almost always reversible with basic maintenance.
Men troubleshooting a specific symptom such as a shaver that cuts out mid-session, makes unusual noises, or will not power on, and need a systematic diagnosis process.
Men deciding between repairing and replacing a shaver that has multiple performance issues and want a clear framework for making the right economic decision.
Conclusion
The overwhelming majority of electric shaver performance problems are not signs of a broken or failing device. They are maintenance signals. Tugging means blades need replacing or the shaver needs cleaning. Reduced closeness means blades are worn or debris has lifted the foil from skin level. Increased irritation means blades are dull or the foil is generating excess heat from clogging. Unusual noise means the shaver needs lubrication or a debris clear.
Work through the relevant problem sections above, complete the full maintenance checklist, and replace the blade cassette if it has been 12 or more months since the last replacement. These steps resolve almost every electric shaver performance problem without replacement.
If troubleshooting confirms the shaver is genuinely at end of life, our complete guide on the best electric shavers for men covers every top replacement option across every price range with honest performance comparisons.
👉 Ready to replace rather than repair? Browse our top-rated shavers on Amazon and check current prices before deciding.
AMAZON AFFILIATE DISCLAIMER
This post contains affiliate links. If you purchase through our links, we may earn a small commission at no extra cost to you.
FAQs
Q1: Why is my electric shaver not cutting properly?
The most common causes are worn or dull blades that bend hair rather than cutting it cleanly, a dirty or clogged shaver head that restricts blade movement, insufficient lubrication causing excess friction, or incorrect technique for the shaver type. Work through the relevant problem section above in order. In the majority of cases, a blade cassette replacement combined with a thorough deep clean and fresh lubrication resolves the problem entirely.
Q2: Why is my electric shaver pulling my hair instead of cutting it?
Tugging is almost always caused by worn blades, a clogged foil head, or both. Dull blades bend hair before cutting rather than severing cleanly, creating the pulling sensation. Packed debris inside the foil restricts blade movement and creates the same effect. Replace the blade cassette and deep clean the shaver thoroughly. These two actions resolve tugging in the vast majority of cases.
Q3: How do I fix an electric shaver that misses patches?
Missed patches are most commonly caused by incorrect technique for the shaver type, a foil head that has lost flexibility due to debris in the pivot mechanism, or hair that is too long for the foil to capture efficiently. Review technique first and use short overlapping strokes for foil or circular motions for rotary. Clean the pivot mechanism. Use a pre-trimmer on longer growth before the main foil pass.
Q4: Why does my electric shaver sound different than it used to?
Increased noise from an electric shaver is typically caused by debris rattling in the blade mechanism, unlubricated blades creating excess friction, a foil cassette that is not fully seated in its housing, or motor wear in older shavers. Clean the shaver thoroughly, apply fresh lubrication, and reseat the foil cassette firmly. If noise persists after these steps, motor wear is likely the cause.
Q5: Why does my electric shaver die quickly after charging?
Reduced battery runtime is caused by normal lithium-ion battery cell aging over repeated charge cycles. A battery that provided 60 minutes when new may provide 35 to 40 minutes after two to three years of daily charging. This is a natural process. If runtime has dropped below 20 to 25 minutes from a full charge, battery replacement or shaver replacement is appropriate depending on model age and replacement cost.
Q6: Can I fix an electric shaver that will not turn on?
In many cases yes. Check the battery is charged, confirm the charging cable is undamaged and fully connected, ensure the travel lock is not engaged, and allow at least 15 minutes of charging before attempting to power on. If the shaver still does not respond, contact the manufacturer for warranty service if applicable. For out-of-warranty shavers over three years old that will not power on, replacement is typically more cost-effective than repair.
Q7: How do I know when to replace my electric shaver instead of repairing it?
Replace rather than repair when: battery life has dropped below 40 percent of original rated runtime, the motor sounds grinding or strained after cleaning and lubrication, the shaver is over six years old with multiple declining metrics, or replacement cassettes for the model are discontinued. If only the blade cassette needs replacing and the motor and battery are sound, repair with a new cassette is almost always the right choice.
Q8: How often should I replace electric shaver blades to prevent performance problems?
Every 12 months for daily shavers with coarse beards, and every 18 months for daily shavers with fine to medium beards. Replace on a fixed schedule rather than waiting for performance to decline. By the time tugging or closeness decline becomes noticeable, blades have typically been past their optimal performance point for several months. Proactive replacement at 12 to 18 months prevents the performance problems that most men attribute to shaver quality rather than blade maintenance.