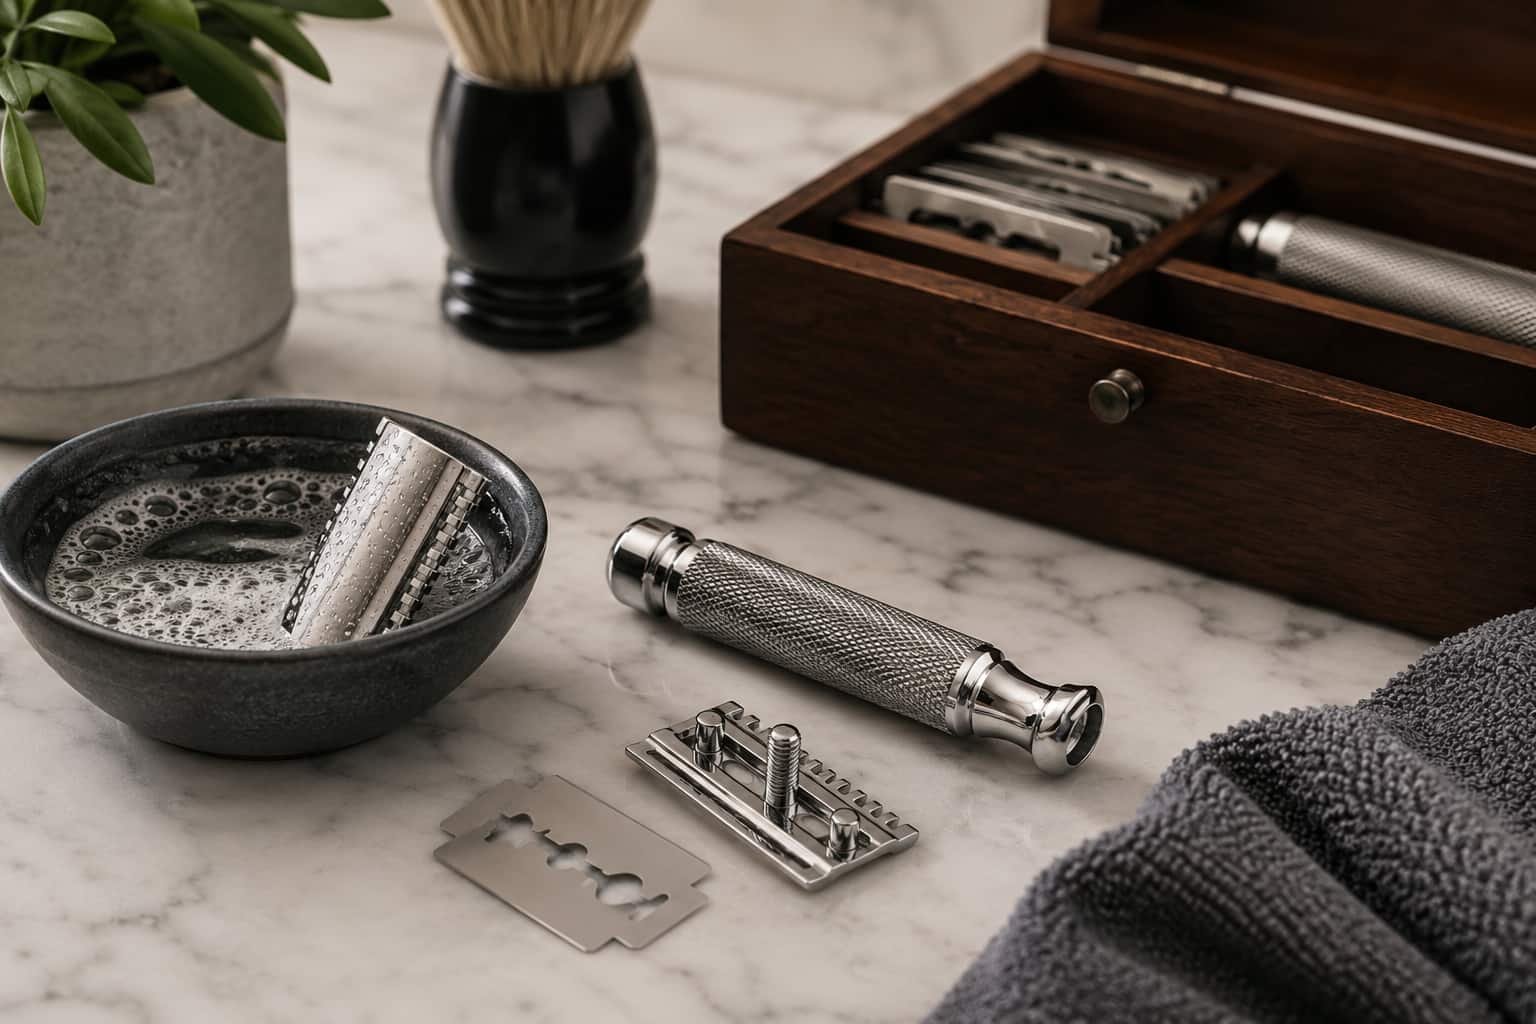
A safety razor is one of the most durable tools you will ever own. A well made metal razor, given basic care, lasts for decades and some wet shavers use razors made before they were born. The difference between a razor that lasts a lifetime and one that fails within a year almost always comes down to maintenance and the good news is that safety razor maintenance is genuinely simple.
Most people overcomplicate it. You do not need special solutions, elaborate drying rituals or long weekly sessions. You need a handful of consistent habits that take under two minutes per shave. This guide covers how to clean your safety razor, how to store both the razor and the blades correctly, how to change blades safely and how to keep the whole razor in top condition for years, whether you just bought your first one or want to refine an existing routine.
Why Maintenance Matters
Understanding what happens to a neglected razor makes these habits feel purposeful rather than arbitrary.
Soap Scum and Hard Water Deposits
Every shave leaves residue: soap, cream, skin oils and hard water minerals build up on the head, threads, and blade gap. Fresh residue rinses off easily but accumulated residue hardens into a crust that is much harder to remove and can eventually affect blade alignment and shave quality. Hard water deposits are especially stubborn and in a hard water area you will see white or grey buildup within days of skipping a thorough rinse, which can pack the blade gap and make the head harder to open.
Blade Corrosion
A blade left wet between shaves corrodes faster than one allowed to dry, with the corrosion starting at the cutting edge and dulling the blade long before it has given its full number of comfortable shaves. Proper drying after each shave meaningfully extends blade life.
Handle Deterioration
Chrome plated handles can develop rust spots if moisture pools in the knurling or thread cavities, while stainless steel resists this far better but is not fully immune. The threads connecting handle to head are particularly vulnerable on zinc alloy and chrome plated brass razors, so keeping them dry and occasionally cleaning them prevents the stiffening and corrosion that makes disassembly difficult.
Blade Misalignment Over Time
Grit and buildup between the blade and the head can shift blade positioning, and a blade even slightly off center gives an inconsistent shave that is hard to diagnose by feel. Regular cleaning keeps the contact surfaces between blade, base plate and top cap clean and precise.
Shop Safety Razor Cleaning and Maintenance Products on Amazon
How to Clean a Safety Razor After Every Shave
The most important maintenance happens right after each shave and these habits take under sixty seconds and prevent most problems before they start.
Rinse Thoroughly Under Running Water
As soon as you finish, hold the razor under a strong flow of warm water, moving it back and forth to flush water through the blade gap and around the head from several angles, which clears the fresh hair, soap and skin debris. Pay attention to the blade gap where hair packs most densely, opening a three piece head slightly or a butterfly’s flaps briefly under the flow. Spend at least twenty to thirty seconds on this, since it is the single most important step and the one most people rush.
Shake Off Excess Water
Give the razor three or four firm shakes to remove most of the water but do not tap it against the sink, since tapping can misalign the blade over time and risks chipping a ceramic sink.
Never Dry With a Towel
Drying with a towel seems logical but the fibres catch on the blade edge, dulling it and leaving fibres in the gap, so air drying is always correct. Stand the razor upright in a stand or on a clean dry surface where air can circulate, which beats lying it flat because it stops water pooling around the head.
Assembled or Disassembled?
This is a matter of preference with no universal answer. Leaving it assembled is convenient and perfectly fine for daily use, keeping the blade aligned with no reassembly. Some shavers open the razor after every shave for faster drying, which is a good habit in humid environments and if you do, set the parts on a clean surface where they will not fall.
Weekly Deep Cleaning
A more thorough clean once a week clears the buildup a daily rinse cannot and it takes five to ten minutes.
You need a soft bristle toothbrush, a small bowl, warm water and either a drop of dish soap or a little white vinegar. Fill the bowl with warm water and add the soap or a tablespoon of vinegar, choosing dish soap for chrome plated and zinc alloy razors, and using vinegar (diluted, not left long on chrome) for dissolving mineral deposits. Disassemble the razor completely, handling the blade by its short ends only and setting it in a blade bank while you clean. Soak the head components for two to three minutes to soften residue, then gently scrub all surfaces with the toothbrush, focusing on the threads, knurling grooves, and the underside of the top cap, using light pressure so you do not wear the plating. Rinse thoroughly until no soap remains, shake off the water and air dry fully before reassembling.
For stubborn hard water deposits that a normal clean will not shift, soak the disassembled head in undiluted white vinegar for fifteen to thirty minutes, then scrub and rinse very thoroughly and on chrome plated razors do not exceed thirty minutes since extended contact can affect lower quality plating. Do not overlook the threads on the handle and head post, since a few toothbrush strokes along the grooves each week keeps them clear and prevents the stiffening that makes disassembly hard.
Browse Safety Razor Maintenance Products on Amazon
Monthly Inspection and Care
Once a month, spend a few minutes inspecting the razor to catch problems early. Check the chrome or plating under good light, since minor scratches are cosmetic but lifting, pitting or rust underneath needs a light application of oil and significant head damage can eventually affect alignment. Check the threads by screwing the handle on and off, feeling for roughness that signals buildup. Check head alignment with a fresh blade fitted, looking from the front to confirm the blade protrudes evenly on both sides and cleaning thoroughly if one side shows more than the other and if your razor has moving parts, like a butterfly mechanism or an adjustable dial, apply the tiniest amount of mineral oil once a month, since excess oil attracts dust and hair.
Blade Changing: Complete Guide
Changing blades safely is the most technically demanding part of maintenance and it is where most blade related incidents happen, since the risk is in handling the blade rather than shaving with it.
How Often to Change Blades
Blade life varies with hair coarseness, shaving frequency, and blade quality. For men shaving faces, every five to seven shaves suits most beards, dropping to three to four for very coarse beards. For women shaving legs and body, every three to four shaves, since the larger area dulls blades faster and a dull blade on the inner thigh or bikini area reliably causes irritation. The universal signal is feel, not a number: when the shave starts to drag or pull rather than glide, change the blade regardless of count. Our dedicated guide on how long a safety razor blade lasts covers every sign in detail.
The Signs of a Dull Blade
The most common sign is a dragging or tugging feel where there used to be a smooth glide, as the blade pulls the hair before severing it. A second is needing more pressure than usual for a clean cut. A third is more post shave irritation with no change in technique, since a dull blade causes more skin trauma per stroke and a fourth is any visible rust, spotting or discoloration, which means change it immediately.
How to Remove a Used Blade Safely
Never touch the cutting edges of a used blade, which stay extremely sharp even when dull for shaving. For a three piece razor, unscrew the handle, separate the head and lift the blade by its short ends straight into your blade bank. For a butterfly razor, hold it over the blade bank before opening the flaps and let the blade drop or tilt it in by the short ends, never opening it over the sink or floor. If a blade sticks to the cap or base plate from soap residue, run warm water over the head to release it rather than prying with a finger.
How to Load a New Blade Safely
Remove the new blade from its wrapper by the short ends only, since most packaging opens to expose the short ends without touching the edges. For a three piece razor, lay the blade flat on the base plate so its holes align with the post, place the top cap on, and screw the handle finger tight, then check from the front that the blade is centered and even. For a butterfly razor, open the flaps, lay the blade flat with its holes on the posts and close by twisting the handle base, then check centering. Never force a blade, since if it does not seat evenly with minimal pressure something is misaligned, so remove it by the short ends and try again.
Safe Blade Disposal
Used blades are extremely sharp and must be disposed of safely, and wrapping one in tissue in the bin is not safe because it cuts straight through and endangers anyone handling waste. The correct method is a blade bank, a small metal or plastic container with a slot that holds used blades safely, usually 50 to 100 before it is full. When full, seal it with tape and put it in general waste or take it to a metal recycling facility if one near you accepts small metal items. You can make a simple blade bank from an empty metal tin with a slot in the lid, though commercial ones are cheap and worth buying.
Shop Blade Banks and Disposal Containers on Amazon
How to Store Safety Razor Blades
Storing the blades themselves, both new and used, is a separate question from storing the razor and getting it right protects your blades from rust and keeps everyone safe.
Storing New (Unused) Blades
Double edge blades are steel, so they rust if exposed to moisture over time, even inside their wrappers. Keep new blades in their original wax paper wrappers and box until you are ready to use them and do not unwrap a blade until it is going into the razor. Store the box in a cool, dry place away from the bathroom, since bathroom humidity is the main cause of blades rusting before use, so a bedroom drawer or a linen cupboard is far better than a steamy bathroom shelf. If you buy in bulk, like a 100 blade pack, leave the sealed sleeves intact and only open one sleeve at a time. In a very humid climate, dropping a small silica gel packet into the storage box adds extra protection. Stored this way, sealed blades keep their edge for years.
Storing Used Blades
Used blades go straight into a blade bank, as covered above, which safely contains them until you dispose of the full bank. Never leave loose used blades in a drawer, on a shelf or in a bin, since they are a genuine injury risk. Keeping a blade bank right next to where you shave makes it easy to drop each spent blade in the moment you remove it.
How to Store Your Safety Razor
Where and how you store the razor between shaves has a big impact on its long term condition.
Use a Razor Stand
A razor stand is the single best storage upgrade, holding the razor upright with the head elevated and the handle down so any residual water drips away rather than pooling around the blade gap and keeping the razor off a shelf where it would sit in standing water. Stands come in many materials and styles and the material matters less than the function, so any stand that holds the razor upright and off the surface works well.
Keep It Out of the Shower Spray Zone
Storing the razor directly in the shower spray, where it gets wet every shower whether used or not, is counterproductive, since the repeated wetting and partial drying speeds up blade corrosion and handle wear. Keep it in a dry area and only bring it into the shower when you plan to shave.
Avoid Humid Storage
A closed, poorly ventilated bathroom cabinet holds high humidity that accelerates corrosion, so if you store the razor in a cabinet, make sure it is ventilated, since a slightly open door beats a sealed one.
Traveling With Your Safety Razor
Safety razor blades are banned from carry-on luggage on most airlines, so you have two options: travel with the razor but no blades in your carry-on and buy blades at your destination or pack the razor with blades in checked luggage. Either remove the blade and pack it separately or travel with an empty razor, and some shavers keep a dedicated travel razor for this. Our guide to the best travel safety razors covers airline friendly options in detail.
Maintenance by Razor Type
Three piece razors are the easiest to maintain, since they fully separate into three parts that clean individually, like the Merkur 34C and Edwin Jagger DE89, with the main consideration being the handle to head threads, which you should keep clean and dry and never overtighten.
Two piece razors have a fixed top cap and base plate that screw onto the handle, so cleaning access is slightly less complete, which makes thorough rinsing and weekly toothbrush cleaning of the blade gap even more important.
Butterfly razors have the most mechanical complexity, with pivot points and springs that gather debris faster, so clean into the pivot area with the toothbrush weekly, flush thoroughly and occasionally add a tiny amount of mineral oil to keep the mechanism smooth, testing it opens and closes cleanly.
Adjustable razors have the most complex mechanisms. Modern ones like the Rockwell 6S use a simple plate swap that needs only the standard weekly clean with no lubrication, while vintage adjustables can stiffen with debris and often benefit from an inexpensive ultrasonic jewelry cleaner rather than disassembling mechanisms not designed to come apart.
Restoring a Neglected Razor
If you have a razor that was stored badly, used without care or picked up secondhand, here is how to bring it back. Assess it under good light for rust, heavy deposits, damaged plating, bent alignment tabs and thread condition, since most issues are fixable with cleaning but severely damaged tabs or corroded threads may not be. Deep clean by soaking all metal parts in warm soapy water for ten to fifteen minutes, following with a white vinegar soak for heavy mineral deposits, scrubbing with a toothbrush and rinsing fully. For small rust spots on chrome, gently rub with a damp cloth and a little baking soda paste, then rinse and for stainless steel use metal polish with a soft cloth but never use abrasive polish on chrome since it strips the plating. Restore stiff threads with thorough cleaning and a tiny amount of mineral oil, running the handle on and off to work it in and always load a blade and check alignment and smooth thread operation before shaving, only using the razor once you are satisfied it is working correctly.
Amazon Affiliate Disclaimer
This post contains affiliate links. If you buy through one of them, we may earn a small commission at no extra cost to you.
Frequently Asked Questions
How do I store safety razor blades?
Keep new blades in their original wax paper wrappers and box, in a cool, dry place away from the bathroom, since humidity is the main cause of blades rusting before use. Do not unwrap a blade until you are ready to use it, keep bulk sleeves sealed and add a silica gel packet in humid climates. Store used blades in a blade bank until it is full and ready to dispose of.
How often should I clean my safety razor?
A thorough rinse after every shave is the minimum, a full disassembly and toothbrush clean once a week keeps it in top condition and a monthly inspection for wear rounds out the routine.
Can I put my safety razor in the dishwasher?
Not recommended. Dishwasher detergents are abrasive and the high heat can damage chrome plating and wear zinc alloy parts. Stainless steel tolerates it better but even then a hand clean with warm soapy water and a soft brush gives better results with less risk.
How do I remove hard water stains from my safety razor?
Soak it in undiluted white vinegar for fifteen to thirty minutes, then scrub gently with a soft toothbrush and rinse thoroughly, repeating for heavy deposits. Keep the soak under thirty minutes on chrome plated razors.
Can I use alcohol to clean my safety razor?
A brief wipe with isopropyl alcohol is fine for sanitizing, especially with a shared or secondhand razor but avoid extended alcohol soaking on chrome plated razors, since it can affect the plating over time.
How do I know when a blade is too dull to use?
The main signal is feel: when it drags or pulls rather than glides, change it. Other signs are more irritation, visible spotting or oxidation and needing more pressure than usual for a clean cut.
Should I oil my safety razor?
A little mineral oil on the threads and any moving parts of butterfly or adjustable razors helps lubrication and prevents corrosion, using the minimum amount. The head and blade themselves do not need oiling.
How do I dispose of used blades safely?
Use a blade bank. Drop used blades through the slot until it is full, then seal it and put it in general waste or take it to a metal recycling facility. Never wrap loose blades in tissue and bin them.
Can I sharpen a dull safety razor blade?
They are not designed to be resharpened and at 10 to 50 cents each, replacement is the right approach. Some enthusiasts briefly strop on denim to extend blade life but it adds more complexity than value for most shavers.