Learning how to shave with a straight razor can feel scary at first. The blade is open, the technique is different from a cartridge razor, plus there is no safety guard protecting your skin. But once you understand the right angle, pressure, prep and shaving direction, a straight razor can give one of the cleanest shaves you can get at home.
A straight razor shave is not about speed. It is about control. You need to prepare your beard, create slick lather, stretch the skin, hold the razor correctly and use slow short strokes. The first few shaves may not be perfect, but your technique improves quickly when you follow the right process.
This beginner guide will show you how to shave with a straight razor step by step. You will learn what tools you need, how to prepare your skin, how to hold the razor, what angle to use, how much pressure is safe, how to shave cheeks, neck, chin and mustache area, plus how to care for your skin after shaving.
Quick Beginner Summary
| Step | What to Do | Why It Matters |
| 1 | Wash your face with warm water | Softens beard hair |
| 2 | Apply pre shave oil or cream | Adds glide and protection |
| 3 | Build slick shaving lather | Reduces razor drag |
| 4 | Hold razor at a shallow angle | Helps prevent scraping |
| 5 | Use short light strokes | Improves control |
| 6 | Shave with the grain first | Reduces irritation |
| 7 | Rinse with cool water | Calms the skin |
| 8 | Apply aftershave balm | Helps soothe dryness |
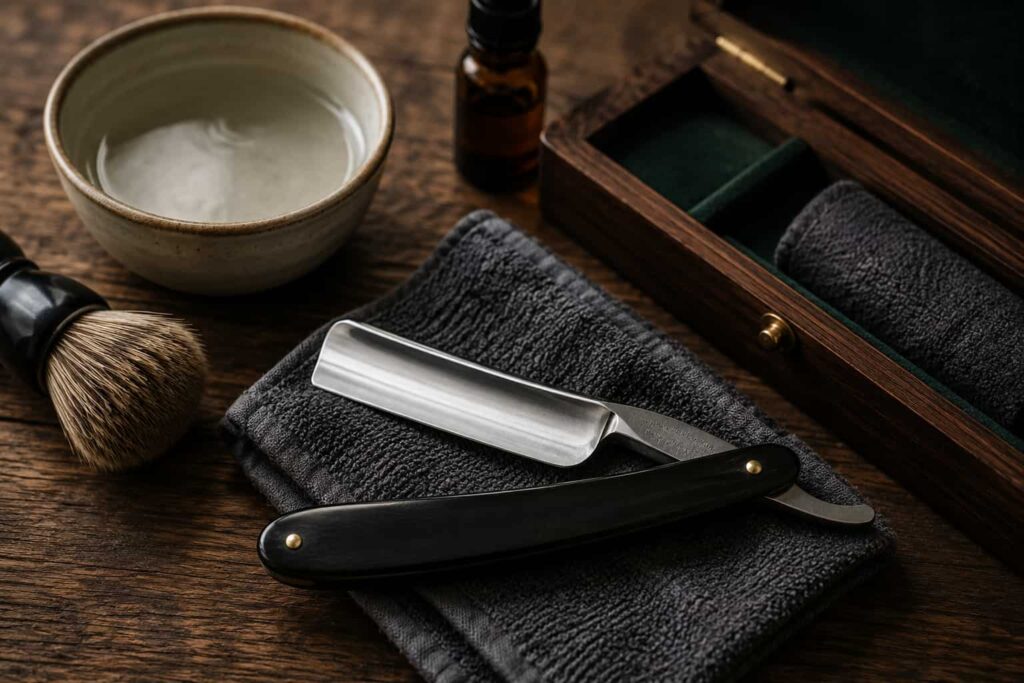
Tools You Need Before Shaving

You should not start with only a straight razor and water. Straight razor shaving needs proper tools because the blade sits directly against your skin.
Straight Razor
You can use a traditional straight razor or a shavette. A traditional straight razor has a fixed blade that needs stropping and occasional honing. A shavette uses replaceable blades, so it does not need sharpening.
If you are still choosing your razor, start with the best straight razors of 2026 guide before buying. Beginners usually do better with a 5/8 traditional razor or a beginner friendly shavette.
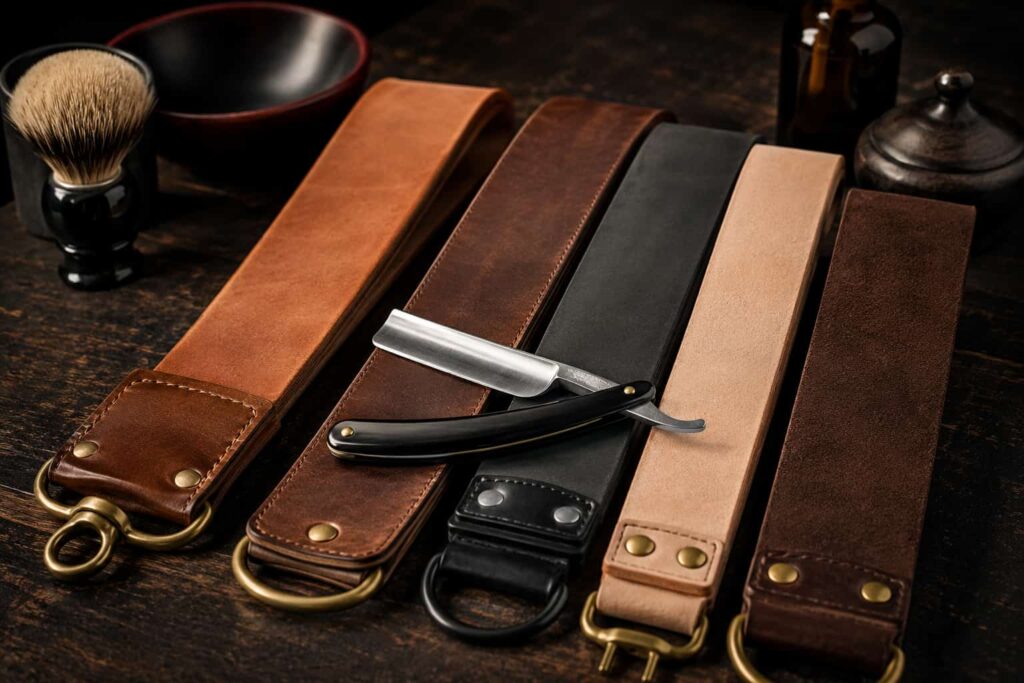
Leather Strop
A leather strop is needed if you use a traditional straight razor. Stropping does not sharpen the blade like a stone. It helps align the edge before shaving so the razor feels smoother.
You normally strop before shaving. Do not skip this step if you are using a fixed blade straight razor.
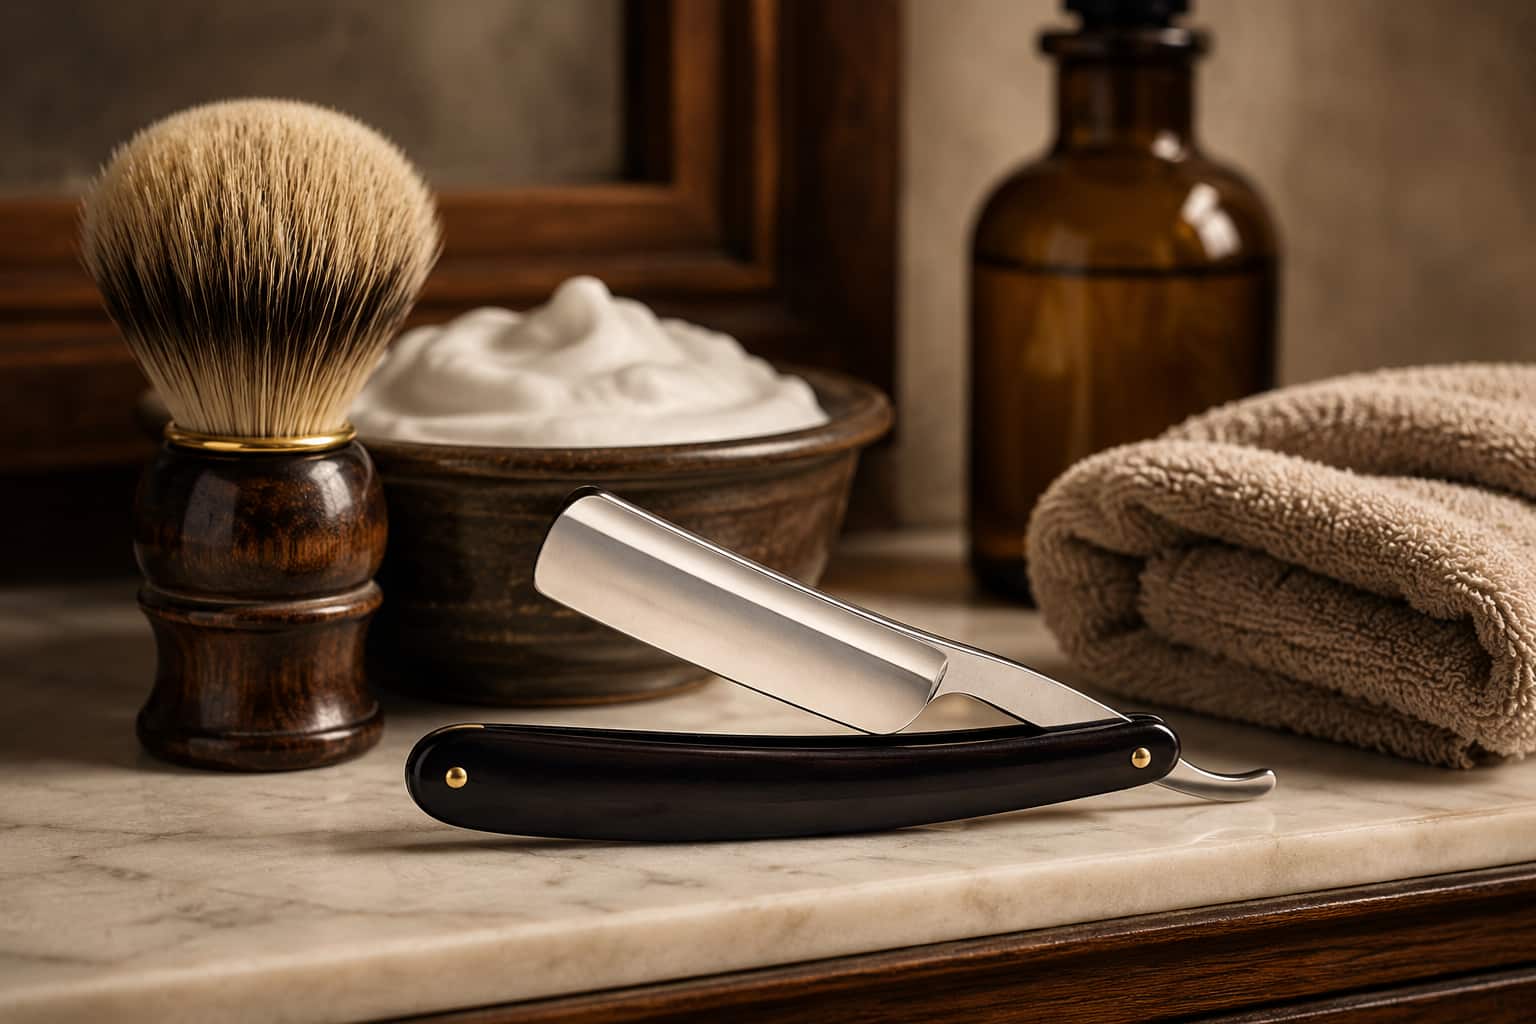
Shaving Brush
A shaving brush helps build rich lather. It also lifts beard hair so the razor can cut more cleanly. A synthetic brush is easy to maintain. A badger brush feels more traditional.
Shaving Cream or Soap
Use a slick shaving cream or soap. Foam from a can is usually not ideal for straight razor shaving because it may not provide enough glide. You need lather that stays wet and slippery.
Pre Shave Product
Pre shave oil, cream or lotion can help protect the skin. It is especially useful if your beard is coarse or your skin gets irritated easily.
Aftershave Balm
Aftershave balm helps calm the skin after shaving. Choose balm instead of alcohol heavy splash if your skin feels dry or sensitive.
Traditional Straight Razor or Shavette for Beginners?
Many beginners get confused between a traditional straight razor and a shavette. Both look similar, but they work differently.
A traditional straight razor has one fixed blade. You maintain that blade with stropping and honing. It feels more classic and can last for years with proper care.
A shavette uses replaceable blades. You do not need to strop or sharpen it. When the blade becomes dull, you replace it. This makes it easier for beginners who want less maintenance.
If you are comparing straight razor vs safety razor, remember this simple difference. A safety razor has a guard and is easier to control. A straight razor gives more freedom but requires more skill.
For most beginners, a shavette is easier to start with. For men who want the real traditional shaving experience, a fixed blade straight razor is more satisfying.
How to Prepare Your Face Before a Straight Razor Shave
Good prep can make the difference between a smooth shave and an uncomfortable shave. Never rush this part.
Wash Your Face
Start by washing your face with warm water. This removes oil, sweat and dirt from the skin. Warm water also softens facial hair, which makes cutting easier.
You can shave after a warm shower. This is one of the easiest ways to prepare your beard. If you do not shower first, use a warm wet towel on your face for two to three minutes.
Apply Pre Shave Oil or Cream
Apply a small amount of pre shave oil or cream to your beard area. It creates a thin protective layer between the blade and skin.
Do not use too much oil. Too much product can make the razor slip in a way that feels less controlled. A small amount is enough.
Build Proper Lather
Use a brush and shaving cream or soap to build lather. The lather should look creamy, shiny and hydrated. If it looks dry or bubbly, add a few drops of water and keep working it.
Apply the lather in circular motions first. This helps lift the hair. Then paint the lather evenly over the shaving area.
How to Hold a Straight Razor
Holding the razor correctly gives you control. At first, the grip may feel strange. After a few shaves, it becomes natural.
Basic Grip
Open the razor fully. Place your index finger, middle finger and ring finger on the shank. Put your thumb under the shank for support. Rest your pinky on the tang if your razor has one.
Your grip should feel stable but not tense. Do not squeeze the razor too hard. A relaxed hand gives better control.
Use Your Dominant Hand First
Start with your dominant hand for both sides of the face if switching hands feels difficult. Some experienced users switch hands for each side, but beginners do not need to do that right away.
Keep the Wrist Steady
Your wrist should not twist too much. Move the razor with controlled hand motion. Keep the blade angle consistent during each stroke.
Best Straight Razor Angle for Beginners
Angle is one of the most important parts of straight razor shaving. If the angle is too steep, the blade scrapes the skin. If the angle is too flat, it may not cut hair well.
A good starting angle is around 20 to 30 degrees from the skin. You do not need to measure it exactly. Think of keeping the spine of the razor slightly lifted from the face.
For beginners, it is safer to start with a shallower angle. If the razor is not cutting well, adjust slowly. Never make sudden angle changes while the blade is moving.
How Much Pressure Should You Use?
Use almost no pressure. This is very important.
A straight razor is sharp enough to cut hair without force. Your hand should guide the blade, not push it into the skin. Pressing harder can cause nicks, razor burn and irritation.
If the razor is pulling hair, the problem is usually poor prep, dry lather, dull blade or wrong angle. Do not solve pulling by adding pressure.
How to Shave with a Straight Razor Step by Step
Step 1: Start with the Cheeks
The cheeks are the easiest area because the skin is flatter. Start here before shaving the chin, neck or mustache area.
Stretch the cheek skin gently with your free hand. Place the razor at a shallow angle. Use short downward strokes with the grain.
Do not try to clear the whole cheek in one long pass. Use strokes that are one to two inches long. Rinse the blade often.
Step 2: Shave the Sideburn Area
Move carefully around the sideburns. Use small strokes and follow your natural hair growth direction.
If you are shaping sideburns, take your time. A straight razor gives clean lines, but mistakes are easy if you rush.
Step 3: Shave the Jawline
The jawline is harder because the surface curves. Stretch the skin upward or sideways to make the area flatter.
Use short strokes and keep pressure light. If the blade feels awkward, adjust your head position instead of forcing the razor.
Step 4: Shave the Neck
The neck is where many beginners get irritation. Hair growth on the neck often changes direction. Before shaving, feel your neck hair with your fingers so you know the grain direction.
Shave with the grain first. Do not go against the grain on your first few shaves. Use very light pressure and short strokes.
If your neck is sensitive, one pass may be enough in the beginning.
Step 5: Shave the Chin
The chin has curves and thicker hair. Stretch the lower lip upward to flatten the skin. Use small controlled strokes.
Do not attack the chin from many directions. Keep it simple. Shave with the grain first and clean small areas slowly.
Step 6: Shave the Mustache Area
The mustache area is tricky because the skin is tight and the area is small. Stretch your upper lip downward over your teeth. Use tiny strokes.
Keep the razor angle shallow. Do not use pressure. If this area feels too risky during your first shave, leave it for a safety razor and practice later.
Step 7: Rinse and Check
After the first pass, rinse your face with warm water and feel for missed areas. Beginners should not chase perfect smoothness at first.
If you want a second pass, reapply lather. Never shave dry skin with a straight razor.
Step 8: Do a Second Pass Only If Needed
A second pass can improve closeness, but it also increases irritation risk. Beginners should do a second pass across the grain, not against the grain.
If your skin feels hot, tight or irritated, stop after one pass.
Should Beginners Shave Against the Grain?
Not at first. Shaving against the grain with a straight razor can give a closer result, but it also increases the chance of irritation, cuts and ingrown hairs.
Start with one pass with the grain. Once your technique improves, try across the grain. Only try against the grain when your skin can handle it and your hand feels steady.
For many men, one with the grain pass plus one across the grain pass is enough.
After Shave Care

After shaving, rinse your face with cool water. This helps calm the skin and remove leftover lather.
Pat your face dry with a clean towel. Do not rub hard. Apply aftershave balm to soothe the skin. If you have sensitive skin, choose a gentle balm without heavy alcohol.
Good after shave care matters because straight razor shaving can expose skin to more direct blade contact. A proper balm helps reduce dryness and tightness.
Amazon CTA: Check soothing aftershave balms and pre shave care products on Amazon if your skin feels dry after shaving.
How to Clean the Straight Razor After Shaving
Rinse the blade carefully to remove lather and hair. Do not let water stay inside the pivot area.
Dry the blade fully with a soft towel. Be careful around the edge. For carbon steel razors, drying is very important because moisture can lead to rust.
Leave the razor open for a short time in a dry place before storing. Do not store it wet inside a case.
If you use a shavette, remove and discard the blade safely when needed. Wipe the holder clean and dry it.
When Does a Straight Razor Need Honing?
A traditional straight razor does not need honing after every shave. It needs stropping regularly and honing only when the edge becomes dull.
Signs that your razor may need honing include pulling, tugging, rough shaving feel or needing too many passes to cut hair. If stropping does not improve the edge, honing may be needed.
You can learn how to hone and sharpen a straight razor at home, but beginners should be careful. Honing takes skill. A professional honing service can be a better choice until you understand edge maintenance.
Common Straight Razor Mistakes Beginners Make
Using Too Much Pressure
This is the biggest mistake. Let the blade cut. Do not press.
Starting with the Neck
Start with the cheeks because they are easier. The neck should come after you feel more comfortable.
Shaving with Dry Lather
Dry lather causes drag. Keep your lather slick and hydrated.
Moving Too Fast
Straight razor shaving is not a race. Slow movement gives better control.
Using a Dull Razor
A dull razor can be more dangerous because it pulls hair and tempts you to press harder.
Skipping Skin Stretching
Flat skin is easier to shave. Stretch gently with your free hand.
Chasing Perfect Smoothness
Your first goal is a safe shave, not the closest shave of your life.
Beginner Safety Tips
- Do not shave when you are tired or distracted.
- Keep the blade moving in straight controlled strokes.
- Never move the blade sideways on the skin.
- Keep fingers away from the edge.
- Use short strokes.
- Stop if your skin feels irritated.
- Do not shave over bumps, cuts or active acne.
- Keep the razor dry after shaving.
- Replace shavette blades before they tug.
- Practice patience.
Best Routine for Your First Week
| Day | What to Do | Goal |
| Day 1 | Shave cheeks only with a straight razor | Learn grip and angle |
| Day 2 | Use your normal razor | Let skin recover |
| Day 3 | Shave cheeks and sideburns | Build control |
| Day 4 | Use your normal razor | Avoid irritation |
| Day 5 | Try cheeks, jawline and easy neck areas | Practice skin stretching |
| Day 6 | Rest or use normal razor | Check skin comfort |
| Day 7 | Try a full with the grain shave | Build confidence |
This slow approach helps you learn without irritating your skin. You do not need to master everything in one shave.
Straight Razor Shaving Tips for Sensitive Skin
If you have sensitive skin, keep the routine simple. Use warm water, slick shaving cream, light pressure and one pass with the grain.
Avoid alcohol heavy aftershaves at first. Use a gentle balm instead. Do not shave against the grain until your skin is comfortable with straight razor shaving.
Also check your blade sharpness. A dull blade can irritate sensitive skin because it pulls hair instead of cutting cleanly.
Final Verdict
Learning how to shave with a straight razor takes patience, but it is not impossible. Start with good prep, slick lather, a shallow blade angle and very light pressure. Use short strokes. Stretch the skin gently. Shave with the grain first and do not chase a perfect result on your first few attempts.
If you want low maintenance, start with a shavette. If you want the traditional experience, choose a 5/8 straight razor and learn stropping. Once your technique improves, straight razor shaving can become one of the most satisfying parts of your grooming routine.
Final Amazon CTA: Check beginner straight razors, shaving creams, strops and aftershave balms on Amazon to build a complete straight razor shaving setup.
Amazon Affiliate Disclosure: As an Amazon Associate I earn from qualifying purchases. This means we may earn a small commission when you buy through links on this page at no extra cost to you.
FAQs
Is shaving with a straight razor hard?
It can feel hard at first, but it becomes easier with practice. The main skills are angle control, light pressure, skin stretching and slow strokes.
What angle should I use with a straight razor?
A good beginner angle is around 20 to 30 degrees from the skin. Keep the angle shallow and adjust slowly if the razor does not cut well.
Should I use pressure with a straight razor?
No. Use very light pressure. The blade should cut the hair by itself. Pressing harder increases the risk of cuts and irritation.
Can beginners shave their neck with a straight razor?
Yes, but the neck should be shaved carefully. Start with the grain and use short strokes. If your neck is sensitive, do only one pass.
Do I need shaving cream for a straight razor?
Yes. You need slick shaving cream or shaving soap. A straight razor should never be used on dry skin.
Should I start with a shavette or traditional straight razor?
A shavette is easier if you want less maintenance. A traditional straight razor is better if you want the classic shaving experience and are willing to learn stropping.
How often should I shave with a straight razor as a beginner?
Start slowly. You can use it every few days while learning. This gives your skin time to recover and helps you improve technique without irritation.
Can a straight razor give a closer shave than a cartridge razor?
Yes, it can give a very close shave when used correctly. But closeness depends on blade sharpness, prep, angle and technique.
What should I do if I cut myself?
Rinse the area with cool water and use an alum block or styptic pencil. Do not keep shaving over the cut.
Is straight razor shaving good for sensitive skin?
It can be good for sensitive skin if you use sharp blades, slick lather, light pressure and proper aftercare. Avoid shaving against the grain in the beginning.