Ask any experienced wet shaver what separates a great safety razor shave from a mediocre on and the answer will almost always come back to two things: angle and pressure. Not the razor. Not the blade. Not the soap. Angle and pressure. These two variables are the foundation of everything in safety razor technique, and getting them right is what transforms the experience from frustrating to genuinely excellent.
Most beginners spend their first weeks of safety razor shaving blaming their razor or their blade for results that are entirely caused by holding the razor at the wrong angle or pressing too hard. Both mistakes are completely understandable. Cartridge razors train you to press. No one teaches you the correct safety razor angle before your first shave. The habits that served you fine with a cartridge razor actively work against you with a safety razor.
This guide is the definitive breakdown of safety razor shaving angles and pressure. By the end, you will understand what the correct angle is, why it matters, how to find it on your face, how to maintain it across different facial areas, and how to develop the zero-pressure habit that is the single most important technical change most safety razor users need to make.
Why Angle and Pressure Are Everything
Before getting into the specifics, it helps to understand why these two variables have such a disproportionate impact on shave quality compared to the equipment you are using.
The Geometry of a Safety Razor
A safety razor is not designed to be dragged across the face the way a cartridge razor is. The geometry of the head, the blade gap, and the safety bar are all engineered around a specific relationship between the blade edge and the skin surface. When the razor is held at the correct angle, the blade meets the skin at exactly the geometry the designer intended. The safety bar stretches the skin correctly. The blade cuts cleanly at the surface. The guard does its protective job.
When the angle is wrong, even slightly, the entire system breaks down. An angle that is too steep brings too much blade into contact with the skin, eliminating the protection of the safety bar and effectively turning a mild razor into an aggressive one. An angle that is too flat means the blade never engages properly with the hair and the razor rides on the guard rather than cutting.
The same razor, the same blade, the same skin and beard, and the same technique otherwise can produce either a smooth, comfortable shave or a rashy, irritated mess depending solely on whether the angle is correct.
The Physics of Pressure
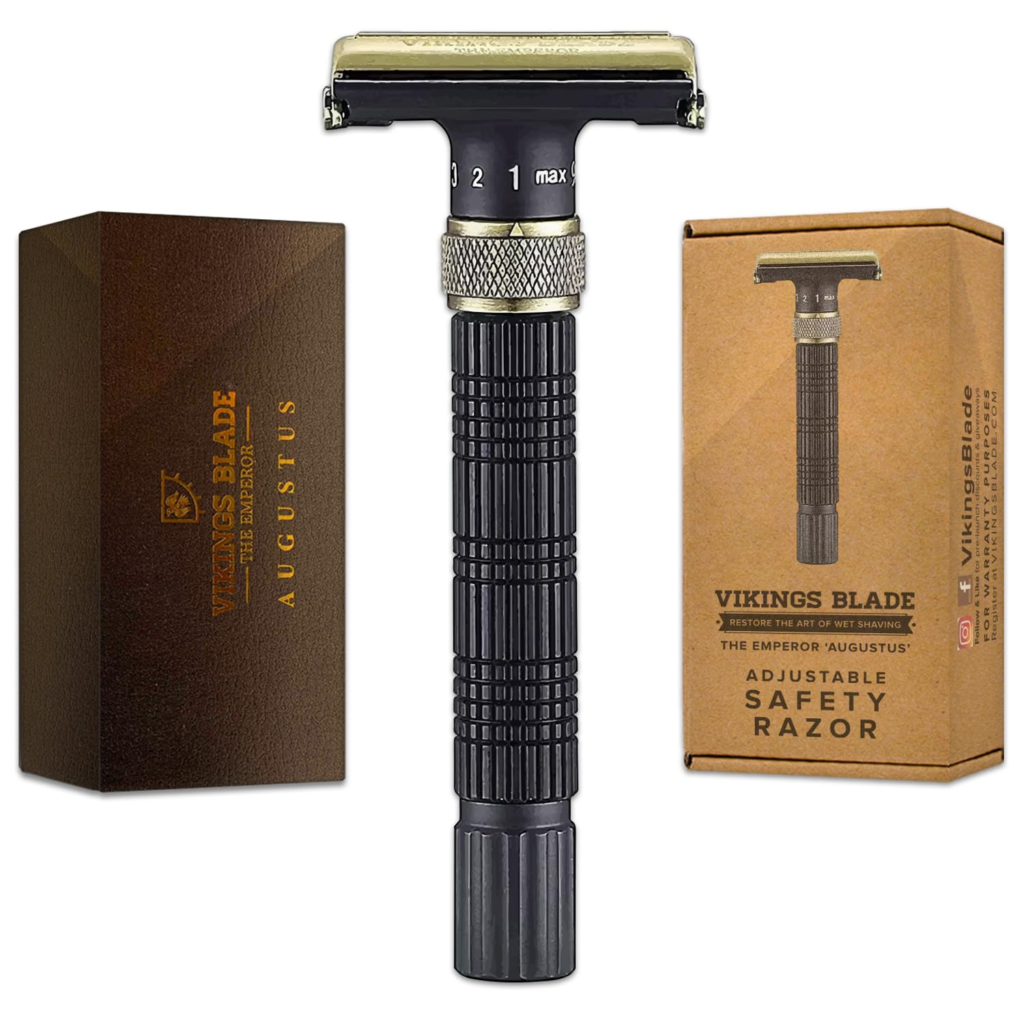
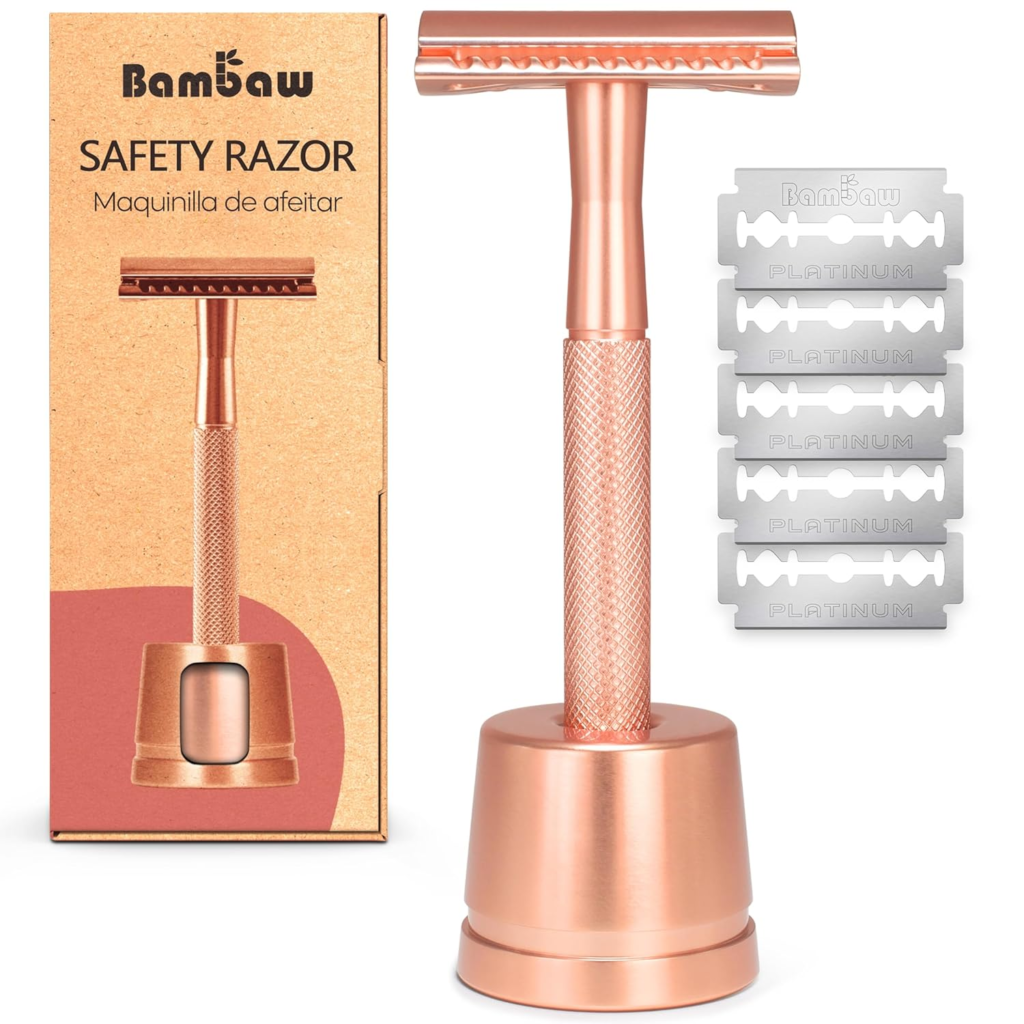
Safety razors are heavy relative to their blade contact area. A Merkur 34C weighing 79g concentrates all of that weight onto a blade edge roughly 38mm long. The weight per millimeter of blade edge is sufficient to cut through beard hair cleanly without any additional force from the hand. The razor is literally engineered to not need your help cutting.
When you add pressure on top of the razor’s own weight, you are not increasing the cutting efficiency. You are increasing the force with which the blade edge contacts the skin. More blade force against skin means more skin deformation per stroke, more mechanical trauma to the skin surface, and significantly higher risk of the blade catching and cutting rather than gliding.
Every nick, every patch of razor burn, every area of post-shave redness that beginners experience, a very high proportion of these are caused by excessive pressure rather than wrong angle. Pressure is the dominant mistake in safety razor shaving.
👉 Check Safety Razor Options on Amazon
Understanding the Correct Angle
What 30 Degrees Actually Means
The frequently cited 30-degree angle for safety razor shaving is a guideline rather than an absolute rule. Different razors, different blade gap configurations, and different head geometries all have slightly different optimal angles. But 30 degrees is the best starting point for the vast majority of razors and the most useful mental reference for finding the correct position.
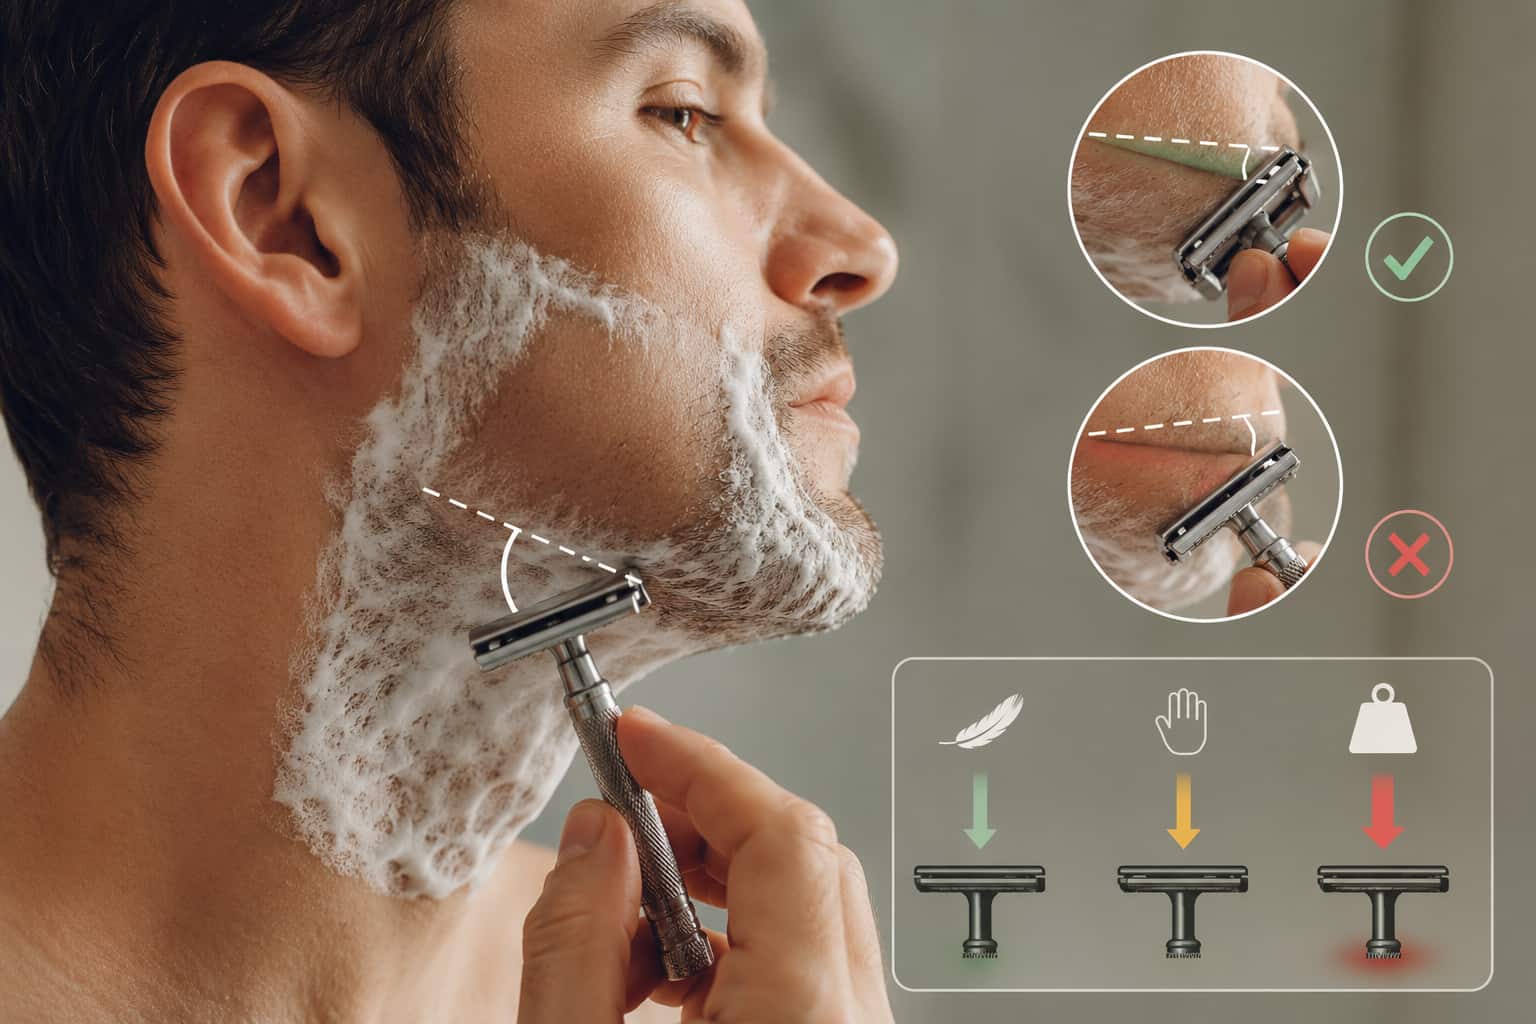
Thirty degrees from the skin surface is shallower than most beginners expect. If you hold a safety razor perpendicular to your face, with the handle pointing straight out at 90 degrees, that is far too steep. If you hold it with the handle lying flat against the face at 0 degrees, that is far too flat. The correct position sits roughly one third of the way between these extremes.
The most useful mental image for understanding 30 degrees is this: hold the handle of the razor parallel to the floor. Tilt the head of the razor toward your face. The head touches the face before the blade does. Tilt slightly further until the blade just begins to engage with the hair. That position, right at the point where the blade makes initial contact, is approximately 30 degrees.
The Two-Step Angle Finding Method
Here is the most reliable method for finding the correct angle when starting a shave or moving to a new area of the face.
Step one: hold the razor with the top cap flat against the skin. The handle is pointing outward and the blade is not yet contacting the face at all. This is the flat starting position.
Step two: slowly tilt the handle downward, rotating the head away from the face, until the blade just begins to engage with the hair. You will feel or hear the blade make initial contact. This is the correct starting angle. The handle will be pointing downward at an angle somewhere between 25 and 35 degrees from the face.
This method works because it starts from the mildest possible position and finds the engagement angle rather than approaching from a steep angle and hoping to find the correct position before causing irritation.
How the Correct Angle Feels
When you are shaving at the correct angle, the razor produces a light, clean cutting sound. Many experienced wet shavers describe it as an audible feedback cue that confirms the angle is right. The blade moves smoothly across the skin with no sensation of drag or resistance. The hair is being cut cleanly at the contact point.
When the angle is too steep, the blade feels like it is biting into or dragging against the skin rather than gliding across it. The sensation is unmistakable once you have felt the correct angle for comparison. There is often a rougher, scraping sound rather than the clean cutting note of the correct position.
When the angle is too flat, the razor slides across the face without cutting. The hair is not being engaged by the blade. The guard is doing all the contact work and the blade is sitting too far from the skin to cut effectively.
Angle Across Different Parts of the Face
The correct angle is not a fixed wrist position that you maintain throughout an entire shave. It is a relationship between the blade and the skin surface that must be maintained dynamically as the razor moves across different facial geometries. This dynamic adjustment is the advanced technique skill that makes the difference between a shave that is good on the cheeks and messy everywhere else versus a consistently excellent shave across the entire face.
The Cheeks
The cheeks are the most forgiving surface on the face and the best place to practice finding and holding the correct angle. The surface is relatively flat and the angle does not need to change much as the razor travels downward from cheekbone to jawline. Most beginners first feel the correct angle on the cheeks before anywhere else.
Practice the two-step finding method on the cheek before each shave session until the position becomes automatic. Once you can find the correct angle on the cheek without thinking about it, you have the muscle memory foundation for the rest of the face.
The Upper Lip
The upper lip requires a slightly different approach than the cheeks. The curved surface of the upper lip combined with the proximity to the nose means the angle needs to be adjusted continuously as the razor moves from the center of the lip toward the corner of the mouth.
Use your free hand to stretch the upper lip outward and downward against your teeth before shaving this area. This flattens the curved surface and makes the angle easier to maintain. Use short strokes of one to two inches. On the centerline directly below the nose, approach from the side rather than straight down to avoid the awkward geometry of the nose itself.
The Chin
The chin surface changes direction multiple times as it curves from the lower lip through the chin itself and into the neck. Hair growth direction often changes here as well, which adds complexity. Map the grain direction on your chin before shaving it and use shorter strokes than on the flat cheeks. The angle will need several small adjustments as you follow the contour.
The Jawline
The jawline is where many beginners pick up nicks because the angle needs to transition from the face geometry to the neck geometry. As the razor follows the jaw from the cheek area toward the chin, the surface orientation changes significantly. Your wrist needs to rotate to maintain the blade-to-skin angle relationship.
Slow down deliberately at the jawline. Be conscious of adjusting your wrist as the skin surface orientation changes. This is a learned motor skill that develops with repetition. After several weeks of daily shaving, the wrist adjustment at the jawline becomes automatic.
The Neck
The neck is the most technically demanding area for angle maintenance. The surface is curved in multiple dimensions simultaneously. Hair growth direction on the neck is highly variable, often growing upward on the lower neck, sideways in the mid-neck, and downward near the chin. The skin on the neck is also less tough than facial skin and more prone to irritation from technique errors.
Map your neck grain direction carefully before shaving it. Use short strokes throughout the neck area. Adjust the angle explicitly between each stroke when you are in the early learning phase. Stretch the neck skin with your free hand before each stroke to create a flatter shaving surface.
The how to shave with a safety razor guide on this site covers neck technique in detail, including how to identify grain direction and the specific approach for the most common neck hair patterns.
The Mustache Area and Sideburns
The mustache area and sideburns require attention to the blade edge angle relative to the boundary you are trying to create. Use the razor’s edge rather than the full head when approaching a defined line. The angle rules remain the same but precision of placement becomes the additional consideration.
👉 Shop Safety Razors with Precise Head Geometry on Amazon
The Zero-Pressure Principle
If you take only one thing from this guide, make it this: the razor does not need your help cutting.
Why Zero Pressure Is the Goal
Zero pressure means that the only force the blade exerts on the skin is the weight of the razor itself. Your hand is guiding direction. It is not adding force to the blade. The difference between zero pressure and even slight pressure is enormous in terms of skin trauma and shave quality.
When the razor’s weight does the cutting, the blade glides across the skin surface. The hair is cut cleanly at the surface without the blade pressing into the skin below it. The skin experiences the mechanical contact of the blade edge at exactly the force that the razor’s geometry is designed around.
When you add pressure, even a small amount, several things happen simultaneously. The blade is pushed harder into the skin surface, increasing the likelihood of the edge catching on uneven skin. The safety bar is pushed deeper against the skin, which changes the effective blade gap and makes the razor behave more aggressively than its design intends. The skin beneath the blade is deformed, which changes the angle at which the blade contacts the hair. All of these effects increase the risk of cuts and irritation.
Why Zero Pressure Feels Wrong at First
Cartridge razor shaving trains an entirely different physical habit. With a cartridge razor, adding pressure improves the shave. The flexible head, the lubricating strip, and the multi-blade design are all engineered to reward pressing. Years of daily cartridge shaving create a deep muscle memory association between pressing harder and getting a better result.
When you pick up a safety razor for the first time, the instinct to press is so ingrained that most beginners cannot feel themselves doing it. It is an automatic response that happens below the level of conscious control. This is why developing zero-pressure technique is not just about understanding the principle. It is about building new muscle memory over several weeks of deliberate practice that overrides the old habit.
How to Develop Zero-Pressure Technique
The most effective method for developing zero-pressure technique is deliberate attention at the start of every shave session during your first month. Before making the first stroke, hold the razor and consciously release any tension in your grip. Let the handle rest between your fingers rather than being gripped. If you are holding the razor in your right hand, imagine that someone is holding your hand open and only your fingertips are keeping the razor in position.
Before each individual stroke in the first week, make this conscious release. Think: let go. Then stroke. The process feels awkward and slow at first. It is supposed to. You are overriding an automatic habit with a deliberate action, and that takes repetition before it becomes the new automatic response.
A practical technique cue that many beginners find helpful is to think of the razor as a paintbrush. You are painting your face with very light strokes, not scraping it. The bristles of a paintbrush only touch the surface with the weight of the brush itself. Your safety razor works the same way.
Another useful cue is to hold the handle between your thumb and first two fingers only, with the remaining fingers extended away from the handle. This light pinch grip physically prevents you from applying significant pressure because the mechanical advantage for pressing is much lower. As zero-pressure technique becomes habitual, you can return to a more natural grip.
The Weight Advantage of Heavier Razors
This is one of the practical reasons why heavier razors in the 85g to 120g range are often recommended for beginners. A heavier razor provides a stronger passive signal against pressing because you can feel more clearly that the razor is carrying itself. The Rockwell 6S at 118g and the Merkur 38C at approximately 120g are frequently cited examples of razors whose weight makes zero-pressure technique more intuitive. This is also why aggressive vs mild safety razors discussions always include weight as a relevant factor.
👉 Check Latest Price on Amazon
Pressure Across Different Facial Areas
Zero pressure is the goal everywhere, but certain areas require more deliberate attention to the principle than others.
Problem Areas for Pressure
The upper lip is one of the most common places where beginners inadvertently add pressure. The small area, the proximity to sensitive skin, and the awkward approach angle all create conditions where pressing feels like it would help. It does not. Use the lip-stretching technique and extremely short strokes with conscious pressure release.
The jawline and the chin are two other areas where pressure creep is common. The instinct to press harder through a curve or around a corner is strong. Slow strokes with deliberate grip relaxation are the solution.
The neck is particularly important to shave with zero pressure because neck skin is less accustomed to razor contact and more reactive to mechanical trauma. A zero-pressure first pass on the neck is the single most effective way to prevent neck irritation for most safety razor users.
Developing Area-Specific Awareness
After each shave, assess your results area by area. If a specific area consistently produces more irritation than others, that is where your pressure or angle is deviating from correct. The alum block is useful here because it reveals exactly where the shave was mechanically rough through the sting response.
Build a mental map of your face that identifies the areas where your technique is most reliable and the areas where it needs more conscious attention. Over several weeks, the problem areas should resolve one by one as deliberate attention converts them from automatic pressure zones to automatic zero-pressure zones.
Angle and Pressure for Different Razor Types
The core principles of angle and pressure apply across all safety razor types, but there are some specific adjustments worth understanding.
Mild Razors
Mild razors are the most forgiving of angle and pressure errors. A small deviation from the correct angle produces minimal consequences. This is why mild razors are recommended for beginners. The margin for error is wide enough to allow technique development without constant negative feedback.
As technique improves on a mild razor, you will notice that your shaves become more consistent and comfortable. This consistency is the signal that your angle and pressure habits are becoming reliable and that you are ready to explore the aggressive vs mild safety razors spectrum for efficiency improvements.
Medium and Aggressive Razors
More aggressive razors have less margin for angle and pressure error. A deviation that would be inconsequential on a Merkur 34C becomes a nick on a RazoRock Game Changer 1.05 or a Merkur 37C Slant. This is not a reason to avoid aggressive razors. It is a reason to develop solid technique on a mild razor before moving to more aggressive options.
When you do move to a more aggressive razor, treat it like a new learning phase. Return to conscious attention on angle and pressure for the first several shaves. Your technique will adapt to the new razor’s geometry over one to two weeks.
Adjustable Razors
Adjustable razors present an interesting angle and pressure dynamic because the same razor behaves differently at different settings. On the mildest setting of a Rockwell 6S, the angle and pressure margins are wide. On the most aggressive setting, they narrow considerably.
When experimenting with different settings on an adjustable razor, always check angle and pressure first if results are disappointing on a new setting. Many shavers who move to a more aggressive adjustable setting and experience irritation immediately move back to a milder one, when in fact the correct response is to refine angle and pressure for the new geometry first.
The Slant Razor
Slant razors like the Merkur 37C present a unique angle consideration because the blade is oriented diagonally across the direction of travel rather than perpendicular to it. The standard 30-degree angle principle still applies in terms of the blade-to-skin relationship, but the diagonal blade orientation means that the wrist position for achieving that angle looks different from a standard safety razor.
The adjustment for most shavers is relatively minor. Approach the slant razor with the same angle-finding method as any other razor and allow the specific feel of the slicing action to guide you toward the correct position.
Building Consistent Technique: A Progressive Approach
The First Week: Angle Only
Spend your first week focusing exclusively on finding and maintaining the correct angle. Do not attempt to manage pressure consciously in parallel. One with-the-grain pass only. Assess results each morning and adjust angle in areas that produced irritation.
By the end of the first week, most shavers have a reasonably consistent angle on the flat areas of the face and are beginning to understand the angle adjustment requirements of the curved areas.
The Second Week: Add Pressure Awareness
Once angle is reasonably reliable, add deliberate pressure management. Before every stroke, perform the conscious grip relaxation described above. Let the razor carry itself. The combination of consistent angle and zero pressure produces a dramatically better shave than either variable alone.
The Third Week: Grain Direction and Passes
With angle and pressure developing into reliable habits, add a second across-the-grain pass. Re-lather fully. Assess whether the second pass adds closeness without adding irritation. If it does, your technique is developing well. If the second pass still causes irritation, return to angle and pressure diagnosis before adding the complexity of a second pass.
The Fourth Week and Beyond
By the end of the first month, most daily shavers have developed reliable angle and pressure habits that produce consistently good results. The shave is still not automatic, but the major technique errors are resolved and each shave is better than the last.
The next technique development phase is learning to recognize subtle angle and pressure deviations before they cause problems rather than diagnosing them from the post-shave result. This predictive technique awareness develops over months rather than weeks and is what distinguishes an experienced safety razor user from an intermediate one.
The complete technique development guide for every phase from first shave to experienced shaver is in the how to shave with a safety razor guide on this site.
Common Angle and Pressure Mistakes: Quick Reference
| Mistake | What It Feels Like | What Causes It | How to Fix It |
| Angle too steep | Blade drags, feels rough | Handle held too perpendicular to face | Start flat, tilt to engagement point |
| Angle too flat | Razor slides, no cutting | Handle held too parallel to face | Tilt head slightly away from face |
| Too much pressure | Razor burn, nicks, redness | Cartridge razor habit | Conscious grip relaxation before each stroke |
| Inconsistent angle on curves | Patches of irritation at jaw, chin | Not adjusting wrist through curves | Slow down deliberately at curved areas |
| Angle varies between sides | One side consistently better than other | Dominant hand habit creates asymmetry | Deliberate angle finding on non-dominant side |
| Pressure increases mid-stroke | Irritation at end of strokes | Unconscious pressure buildup through stroke | Release grip at the midpoint of each stroke |
Advanced Technique: Reading Your Skin
Once basic angle and pressure technique is established, developing the ability to read your skin during the shave represents the next level of skill development.
Real-Time Feedback During the Shave
Experienced shavers develop an ability to feel the difference between a stroke that went well and one that was slightly off, in real time during the stroke rather than from the post-shave result. This real-time feedback comes from the tactile sensation in the hand that holds the razor, the sound of the cutting action, and the visual appearance of the lather as the razor passes through it.
A stroke at the correct angle and pressure leaves lather that has been cleanly cut through with clear razor tracks visible. A stroke with pressure or angle errors leaves lather that looks slightly disturbed or smeared rather than cleanly parted.
Developing this real-time reading skill takes several months of consistent shaving but accelerates dramatically once you know what to look for. The most useful practice is to deliberately vary angle and pressure slightly during the early weeks to build contrast experience. A stroke that is deliberately too steep, too flat, or with too much pressure gives you the sensory reference to recognize those conditions when they appear accidentally.
Predictive Technique
The highest level of technique development is predictive rather than reactive. You notice before a stroke that the skin surface orientation has changed and adjust your wrist pre-emptively rather than correcting mid-stroke. You load a new blade before a shave where you know you will be putting more demand on the blade rather than pushing a fatigued blade. You use a milder pass when your skin is reactive rather than insisting on your normal technique.
This predictive awareness is what separates experienced wet shavers from intermediate ones. It develops naturally over months and years of paying attention. You cannot rush it, but you can accelerate it by actively analyzing your results rather than passively accepting them.
Angle and Pressure for Women Shaving Legs
The angle and pressure principles covered in this guide apply equally to women shaving legs with a safety razor, with some specific adaptations for the different geometry of leg shaving.
On the flat surfaces of the shin and calf, the angle finding method is identical to the face. Hold the handle away from the leg and tilt the head toward the skin until the blade just engages. This position is approximately 30 degrees from the leg surface.
On curved surfaces including the back of the calf, the back of the knee, and the ankle, the same continuous wrist adjustment principle applies as on the face. The curves on the leg are gentler than most facial curves, which makes the adjustment less demanding in most areas. The exception is the back of the knee, which has the same loose-skin challenge as certain areas of the face and requires the same stretched-skin technique.
Zero pressure on legs is particularly important because leg hair is generally finer than beard hair and the large surface areas mean that any pressure-related irritation accumulates across a much larger skin surface than on the face. The detail on technique for leg shaving is covered in the how to shave legs with a safety razor guide on this site.
👉 Check advanced Safety Razors on Amazon
AMAZON AFFILIATE DISCLAIMER
This post contains affiliate links. If you purchase through our links, we may earn a small commission at no extra cost to you.
Frequently Asked Questions
What is the correct angle for a safety razor?
The correct angle is approximately 30 degrees between the handle and the skin surface. The most reliable way to find it is to start with the razor head flat against the skin and tilt the handle downward until the blade just engages with the hair. That initial engagement point is the correct angle.
Why do I keep getting nicks even though I am trying not to press?
Nicks despite conscious pressure management usually come from one of two sources. The angle is too steep in the area where the nick occurred, which effectively increases blade exposure regardless of pressure. Or the pressure management is inconsistent across the stroke rather than zero throughout. Both require deliberate slow practice to diagnose and correct.
How long does it take to develop good angle and pressure technique?
Most daily shavers develop reliable angle and pressure habits within two to four weeks of consistent practice. Occasional shavers take longer because the muscle memory develops more slowly. Daily shaving during the learning phase is the fastest path to good technique.
Can I use a different angle for different razors?
Yes. Different razor head geometries have slightly different optimal angles. The general 30-degree guideline applies broadly but the specific sweet spot varies. Use the two-step finding method with any new razor to find its specific optimal angle rather than assuming the same wrist position as your previous razor.
Why does pressing down feel like it helps?
Pressing down creates a brief sensation of more contact between blade and hair that feels like it should improve the cut. This sensation comes from cartridge razor training where pressing genuinely does improve the result due to the multi-blade and pivoting head design. With a safety razor, this sensation is misleading. The actual result of pressing is more skin trauma rather than better cutting.
Should I use the same angle for a second pass as the first?
Yes, the 30-degree angle applies on every pass regardless of direction. The grain direction of the pass changes but the blade-to-skin angle relationship remains constant. Re-establish the angle using the two-step finding method at the start of each pass rather than assuming the same wrist position carries over.
What is the best way to practice zero-pressure technique?
The most effective practice method is the conscious grip relaxation described in this guide, performed before every stroke during the first two weeks of learning. Hold the razor with a light pinch between thumb and first two fingers. Release any tension before each stroke. Let the razor carry itself. Combine this with watching for the visual feedback of clean lather tracks that confirm the blade is gliding rather than being driven.
Does the blade brand affect the ideal angle?
The blade brand affects sharpness and smoothness but not the fundamental angle requirements of the razor. The head geometry of the razor determines the optimal angle. A sharper blade does not require a different angle, though some shavers find that very sharp blades feel more sensitive to small angle deviations than medium-sharp ones.